
Displaying and Editing RTF Inside Cradle
This blog will help explain what RTF frames are and how they are used within Cradle.
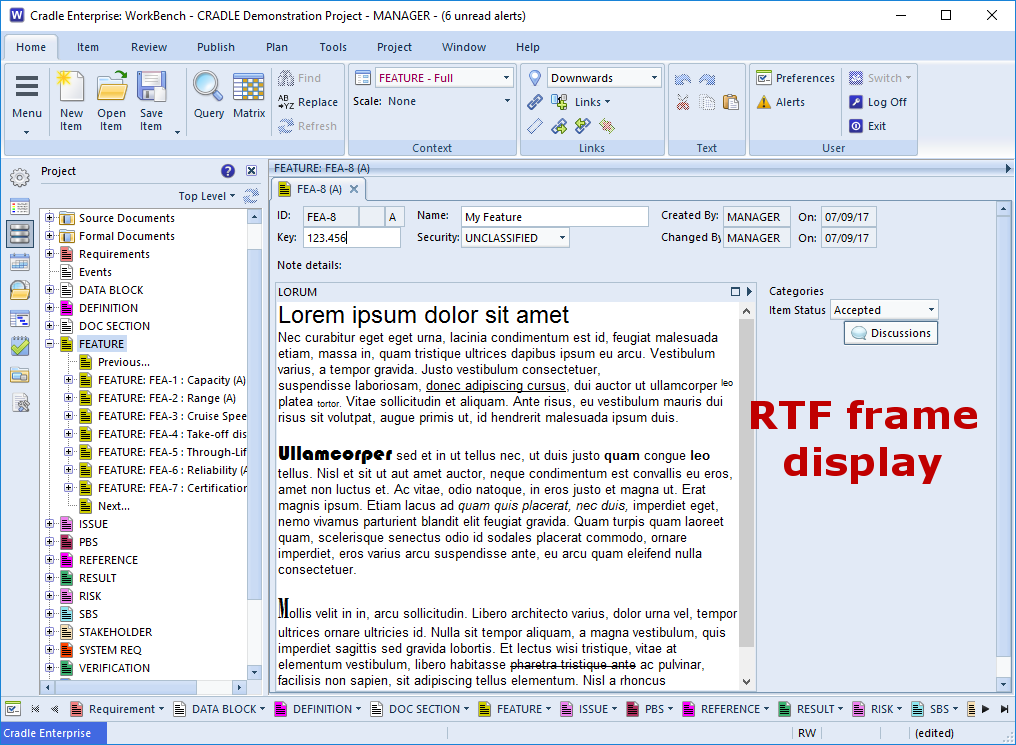
Rich Text Format can be used to enhance the data shown in Cradle. This is displayed in a Rich Text Frame. Whether this is to allow BOLD, Underline or a different Font. Generally requirements and specifications should be broken down into atomic components. The ‘detail’ should be expressed in a short and concise statement or paragraph. However, higher level requirement or tables are often useful and in these cases the emphasis / layout provided by RTF is desired.
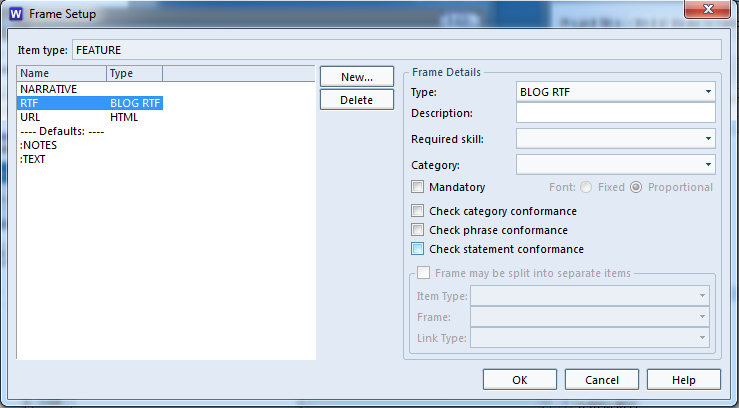
To create the RTF Frame, open WorkBench and navigate to Project Setup. Inside Project Setup from the Options dropdown menu select “Item Definitions” and open the tab Frame Types.
In most cases using the shipped schemas, you’ll see a frame of type RTF, however, the steps to create a frame are: Select New… this will open the “New Frame Type” dialog in which you can give your frame any name, for this I have named mine the “Blog RTF“, You will now see the Frame you have created in the list, select Edit… in this dialog you now have several settings, the “Base Type” will allow you to change the Frame Type, you will want to change this to “RTF“. Other options are available such as being able to restrict the RTF Frame by choosing a Required Skill, provided that you have a set of predefined skills in your project schema.
Now to assign this frame to an Item Type, first you will want to open “Item Types“. Select your item of choice, for this I have selected System Note – Feature. Select “Frames…” and give this a sensible name such as “RTF“.
For more information regarding Frames select here