WorkBench provides a Quick Access Bar that allows you to launch queries by item type from the bottom of the WorkBench main screen. It’s intended to provide quick and easy access to all of the relevant types of information in your Cradle database.
Default Queries
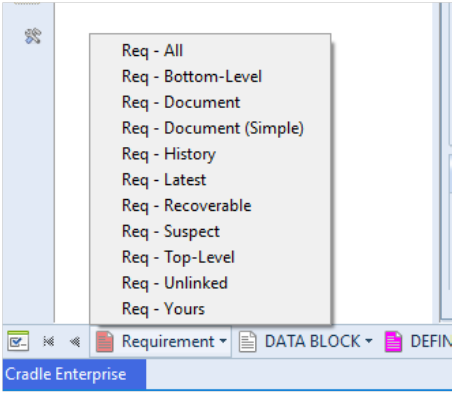
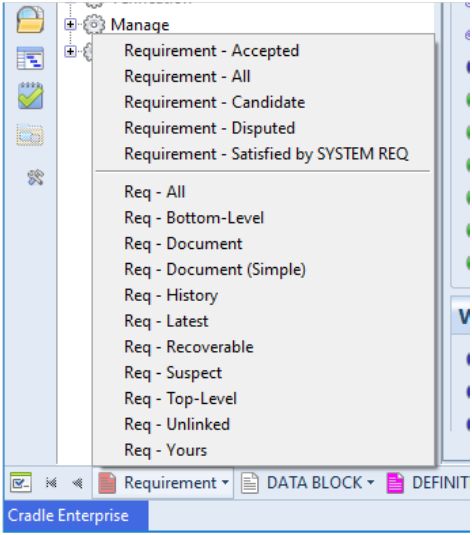
By default, WorkBench is initialised to show a standard (Automatic) set of queries each ordered by the Identity attribute
- All – Lists all items that you can access.
- Bottom-Level – Lists all bottom-level items that you can access. Bottom-level items are items that do not have any cross references from them to other items of the same type. For example, they have no children.
- Document – Lists the latest instance of items that you can access and displays them as a document. For example in Document style.
- Document (Simple) – A simplified version of the Document query.
- History – Lists the latest instance of items that you can access and displays them in a view showing change histories.
- Latest – Lists the latest instance of all items that you can access. There can be many instances of each item, such as many versions of the item.
- Recoverable – Lists all items that are in a recoverable state.
- Suspect – Lists all items that are deemed suspect.
- Top-Level – Lists all top-level items that you can access. Top-level items are items that do not have any cross references to them to other items of the same type. For example, they have no parents.
- Unlinked – Lists all items that you can access that don’t have cross references to or from them from any other items.
- Yours – Lists all items that you own.
These queries may be useful as a starter set of queries. However, it is likely that you will want to tailor the queries shown in the Quick Access Bar to meet your own project needs and use the Project queries and views to display the data.
Note that all automatic queries are ordered by Identity. You might wish to order your Quick Access Bar queries by Key, especially when working with hierarchies of items.
Adding Project Queries to the Quick Access Bar
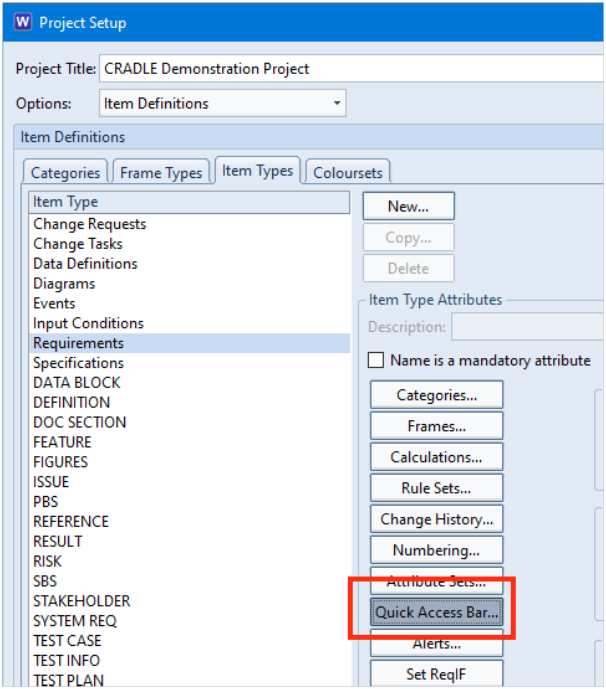
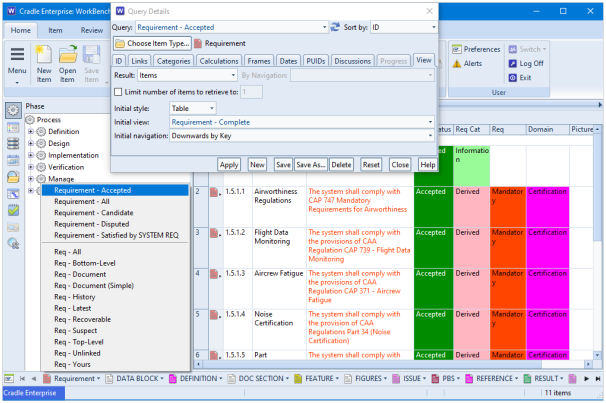
In Project Setup, you can select the item type that you wish to tailor and press the Quick Access Bar button. In this example, we will use Requirements:
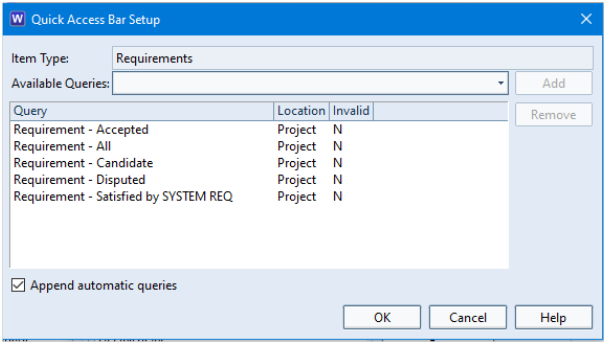
This presents you with a dialog that allows you to add up to 10 Project or System defined queries to your Quick Access Bar.
You can still show the Automatic queries by selecting the Append automatic queries checkbox:
Once applied, all users in the project will see the changes to the Quick Access Bar:
These additional queries will use the view as defined in the Query Details dialog.
Personalising the Quick Access Bar
You may wish to personalise the Quick Access Bar for your own use to only show the item types that are relevant to you in the order that you wish them to be displayed. You can achieve this in the Preferences:
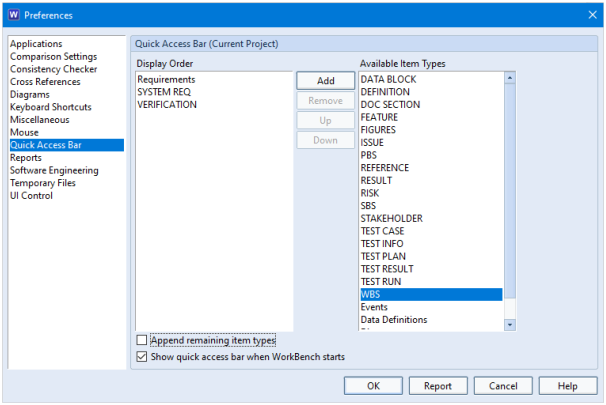
If you select the Append remaining item types checkbox, all other item types are still shown on the Quick Access Bar after the ones you have selected:

For further information on the Quick Access Bar functionality, refer to the help page https://www.threesl.com/cradle/help/7.7/#workbench/other/wrk_qab.htm.