
There are two ways to generate a Document Publisher table. The first table generation method is the Default, this outputs each item row by row. This generation is slower but allows for different styles and formatting in a cell.
The second table generation method is XML which is faster but does not allow for different styles and formatting within a cell. If the user is outputting a simple table then XML is the way to go, especially if it is a large table.
This article highlights some of the limitations and pitfalls with XML output.
A Simple Table Generation
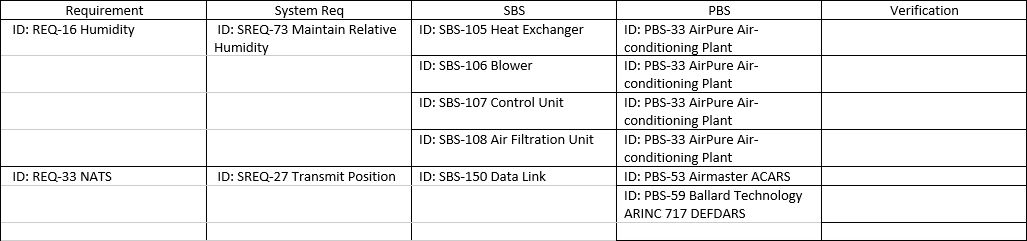
Outputting a simple but large table is quicker by setting the Generation Method to XML.

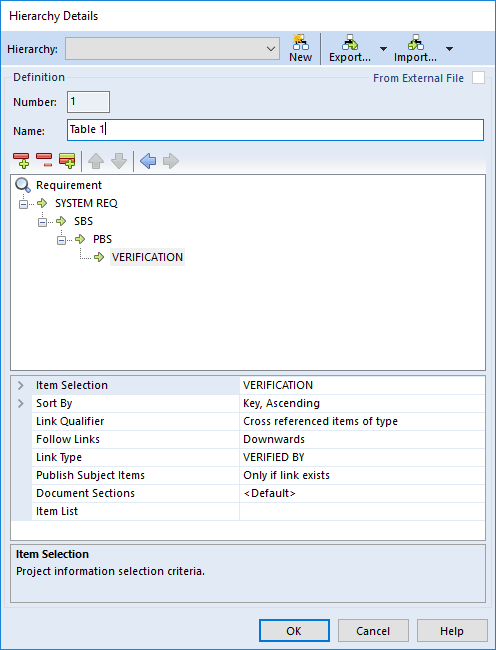
Outputting the above table using a hierarchy as above is much faster using the XML method rather than the Default method.
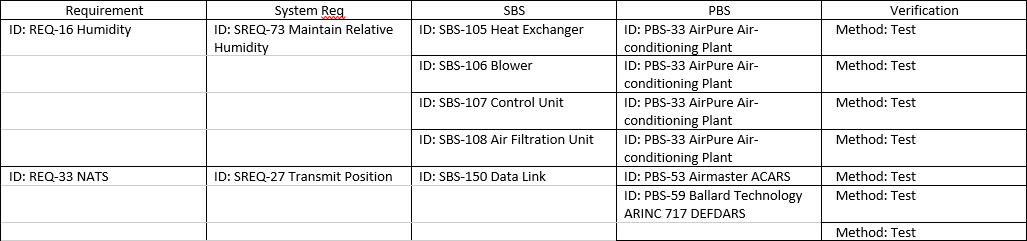
Differences in Styling Text in a Cell When Using the XML Generation Method
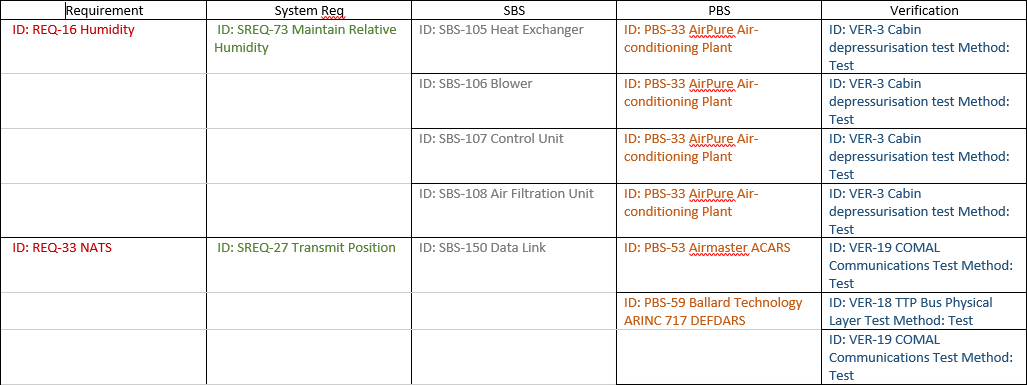
Taking the table above and formatting all the tags in different ways to make them stand out can cause some problems in the XML. For instance the user may wish the Verification Method to be output in a different colour to the rest of the Verification information at present this would cause issues with an XML Table Generation Method.

In the above screen-shot, I have made the Identity and Name of the Verification blue and the Method green. This currently limitation means when generated using the XML Generation method, none of the text is seen under the Verification column.
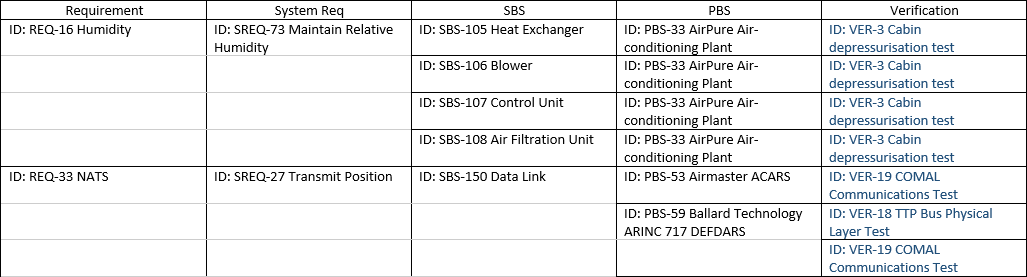
Setting the Verification Method to the Automatic Font colour, the text is output but the Identity and Name will still not show.
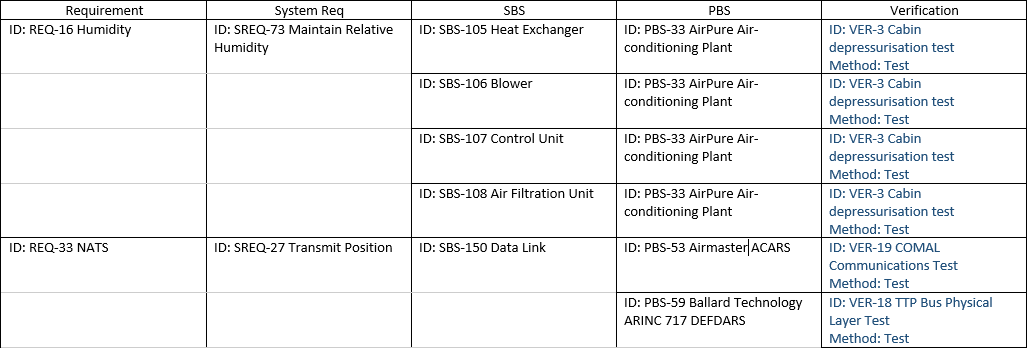
The only way to have the output show correctly is to put the Font Colour on the whole cell:

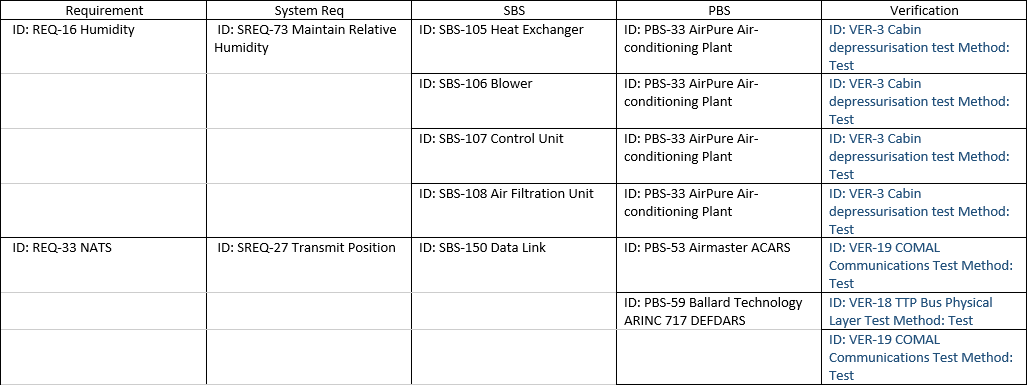
The user can even have all the different columns in different colours and this will output each item and column correctly.
The same goes for making text bold, italic or underlined; unless it is on the whole cell it will cause issues with the output.
Differences in using Formatting Marks in a Cell
Placing formatting marks like between tags in the same cell is also subject to limitations. Placing a single carriage return (new line) between 2 tags can cause the second tag to not be output if placed incorrectly:

When done correctly can still output as the user requires, make sure the cursor is before the bookmark and press Shift+Enter:

Or just putting a full carriage return (paragraph end) between the tags, making sure the cursor is between the 2 bookmarks and not inside one of them:

The alignment of text within a cell must also be the same, the user cannot have one tag as left aligned and another right or center aligned unless there is a full carriage return between them.
You also cannot use Ctrl+Tab for a single tag in the cell as the data will not show in the output.
For more information on Tables in Document Publisher click here