Link rules are used in Cradle as a way of defining constraints for cross reference operations within a project. They specify who can manipulate cross references, the link types that can be used, between what types of item, and which items of these types. This guide to getting started with link rules will help first time users understand the concepts.
The level of detail for each link rule can vary as required for your project’s needs. On one hand they can be very simplistic, allowing links of any link type between all item types. On the other hand they can be more detailed and specific, allowing links between different item types, models and individual item identities.
Throughout this blog post, and future posts, we will explore the Link Rule Setup dialog. These posts will cover the different options available and the result this will have on cross references between items in your project.
Getting started with Link Rules
How to Access the Link Rule Setup Dialog
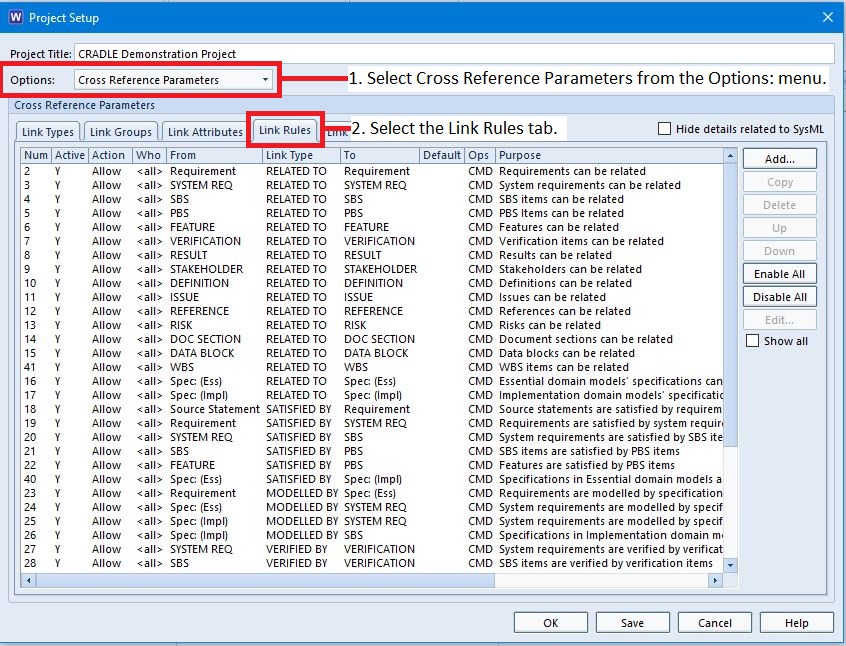
Link rules can be viewed in the Cross Reference Parameters section of Project Setup. They are created and modified in the Link Rule Setup dialog.
To access Link Rule Setup, first open Project Setup. This is found in the Project tab in WorkBench. Once opened select Cross Reference Parameters from the Options: menu and then select the Link Rules tab. Finally, the Link Rule Setup dialog can be displayed by selecting either ‘Add...’ or ‘Edit…‘.
The Link Rules Section of Project Setup
Overview of Link Rule Setup
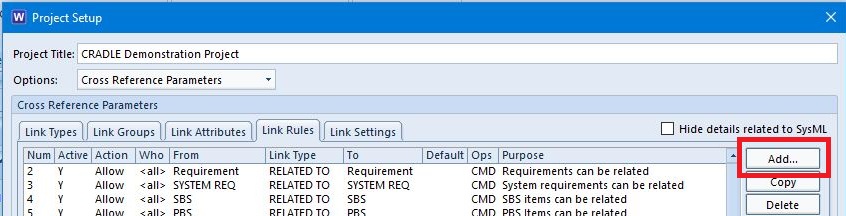
Now we know that link rules can be created and edited from the Cross Reference Paramaters > Link Rules section of Project Setup, it is time to look at Link Rule Setup itself.
Clicking the Add… button on the right side of Project Setup the Link Rules Setup dialog will appear.
Select the Add… Button to Create Link Rules
Link Rule Number
The link rule number is located in the top left of the Link Rule Setup dialog. It is essentially the link rule’sidentity. Using the DEMO project, or your own project with the Default schema, 41 link rules already exist, hence link rule 42 is created.
Location of the Link Rule Number
If you are using an empty schema, or your own schema, the link rule number will be one greater than the number of current link rules.
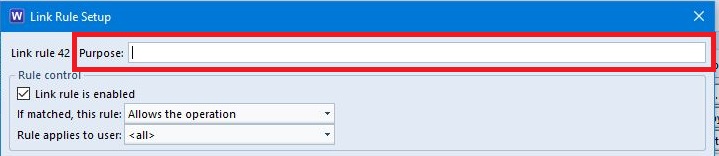
Purpose
The Purpose: field can be used to enter a description of the rule you are creating. This is completely optional and can be left blank if desired.
The Link Rule Setup Purpose Field
Link Rule is Enabled
This option, when selected, enables the link rule. It is checked by default.
Enable Link Rule Check Box
If Matched, This Rule
Is the link rule you are creating going to allow the operation or prevent the operation?
If Matched, this Rule Either Allows or Prevents the Operation
Rule Applies to User
From this drop down menu it is possible to select a specific User the rule applies to. If it doesn’t apply to a particular User, <all> can be set which is the default value.
From the Menu Select Which User the Rule Applies to
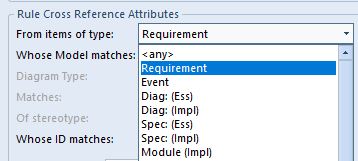
From Items of Type
This drop down menu allows you to select any item type in your project. This will set it as the item type you want the link rule to go from. In the DEMO project Requirement is set by default. There is also an option for <any> which means the rule will go fromall item types.
Whose Model matches
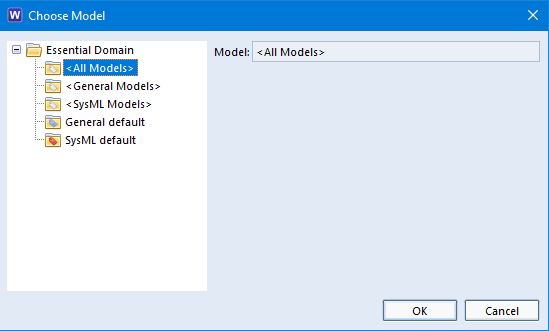
If you have selected domain/model-related information the you can choose which model the from item belongs to. To do this select the Folder icon at the end of the Whose Model Matches: field.
Choose the from item’s Model
Selecting the Folder icon will open the Choose Model dialog.
Choose Model Dialog
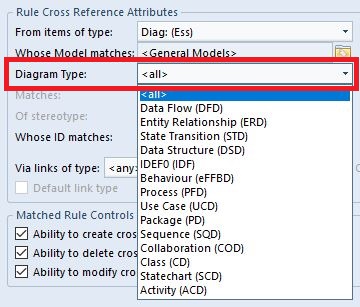
Diagram Type
If you have selected a diagram and model, the Diagram Type: menu becomes active. Select the diagram type you wish to use or choose <all>.
From Diagram Type Menu
Matches
If Whose Model matches is set to either a SysML model or a UPDM model you can choose whether a stereotype:
Is equal to
Is equal to or a descendent of
Of Stereotype
If Whose Model matches is set to either a SysML model or a UPDM model, in conjunction with the option above you can choose a stereotype.
Whose ID matches
Entering an identity in this field will mean the link rule will only apply to that particular item for the from item type and not all items of that type.
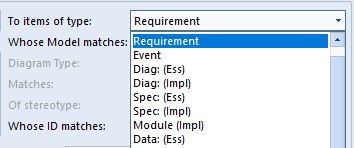
To Items of Type
From this drop down menu you can select any item type in your project. This will set it as the item type you want the link rule to go to. In the DEMO project Requirement is set by default. There is also an option for <any> which means the rule will go to all item types.
To Items of Type
Whose Model matches
If you have selected domain/model-related information the you can choose which model the to item belongs to. To do this select the Folder icon at the end of the Whose Model Matches: field.
Choose the to item’s Model
Selecting the Folder icon will open the Choose Model dialog.
Choose Model Dialog
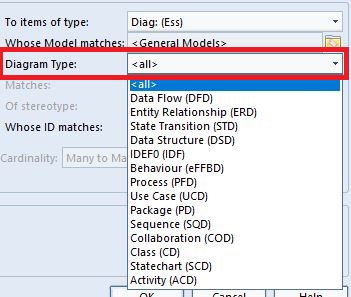
Diagram Type
If you have selected a diagram and model, the Diagram Type: menu becomes active. Select the diagram type you wish to use or choose <all>.
To Diagram Type Menu
Matches
If Whose Model matches is set to either a SysML model or a UPDM model you can choose whether a stereotype:
Is equal to
Is equal to or a descendent of
Of Stereotype
If Whose Model matches is set to either a SysML model or a UPDM model, in conjunction with the option above you can choose a stereotype
Whose ID Matches
Entering an identity in this field will mean the link rule only applies to that particular item for the to item type and not all items of that type.
Via Links of Type
Choose one of the link types, a link group or <any> to apply to your link rule.
The ‘Via Links of Type Menu’
Default Link Type
Set the link type as the default link type for all cross references between the specified from and to item types. So when creating a cross reference the link type that you have set to be the default is automatically selected.
Please note this option can only be applied if the following is true:
Link rule is enabled
Rule applies to user must be set to <all>
Via links of type must NOT be set to <any>
Ability to create cross references is set
From items of type NOT set to <any>
To items of type NOT set to <any>
Matched Rule Controls
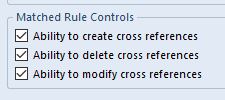
Finally, at the bottom of the Link Rule Setup dialog we have the Matched Rule Controls section and its three options, each with their own check box.
Matched Rule Control
Ability to Create Cross References
Select this check box if you want the rule to have the ability to create cross references.
Ability to Delete Cross References
Select this check box if you want the rule to have the ability to delete cross references.
Ability to Modify Cross References
Select this check box if you want the rule to have the ability to modify cross references.