
Example Scenario
Cradle items can contain many frames, categories and other attributes that might not necessarily be relevant or required to be shown at different stages of your workflow. An example of which is shown below:
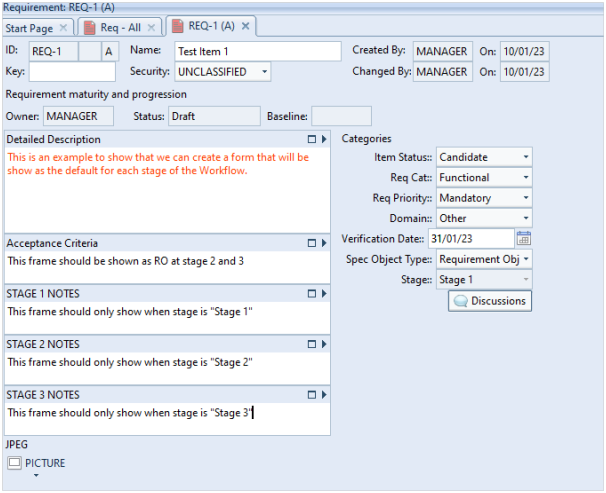
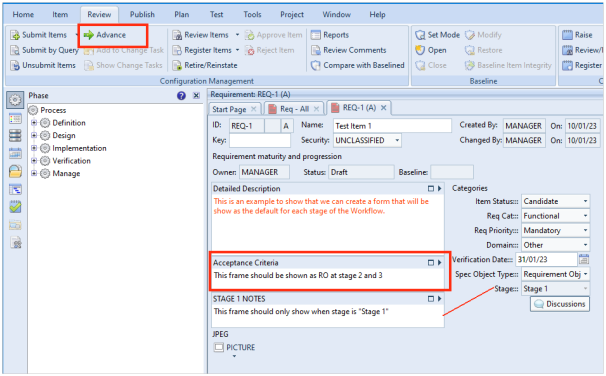
The example provides frames that should only be shown at the relevant stage in the workflow and the Acceptance Criteria, we decided that we wish to show this information at all stages but displayed read-only at stages 2 and 3.
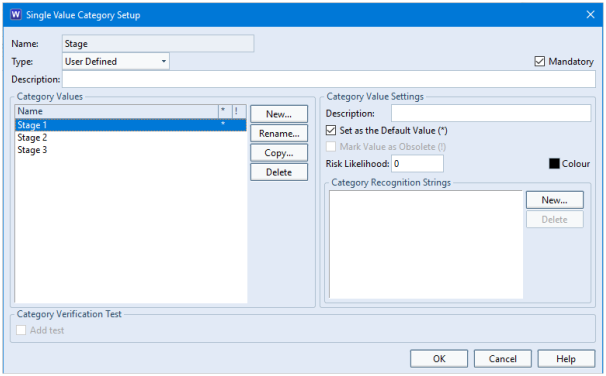
Defining a Stage Category
To start with, create a category to base the workflow on. This must be set as mandatory and have a default value set.
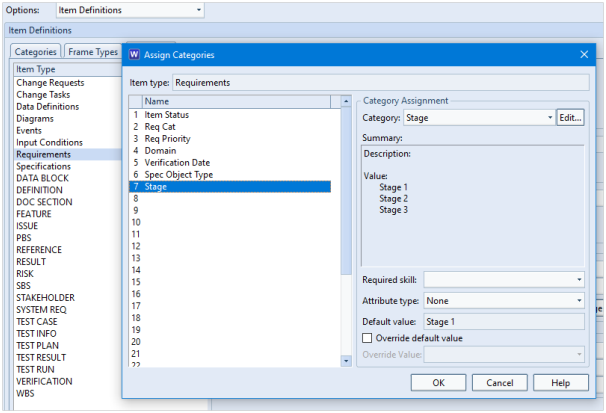
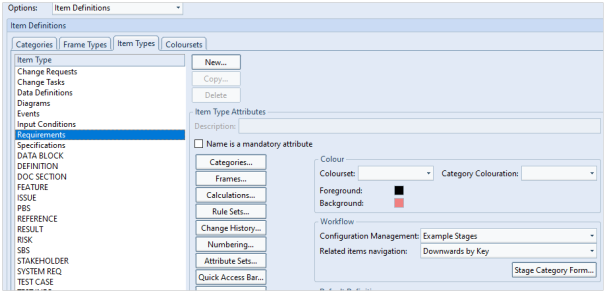
You can then assign this category to the item type. In this example we have used Requirements:
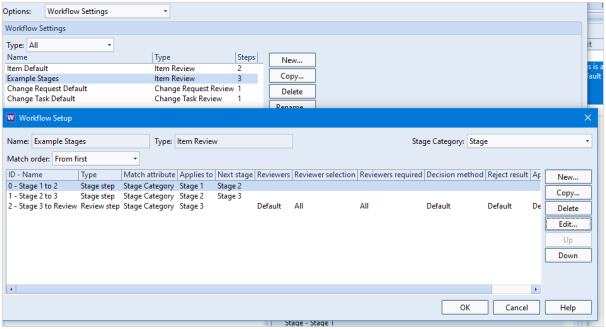
Defining the Workflow
In the Workflow Settings, create a workflow that uses the Stage category to advance to the next stage of the process. In this example, we demonstrate a very simple workflow that advances from Stage 1 to Stage 2 and then Stage 2 to Stage 3. The 3rd level shown here is to then advance to formal review:
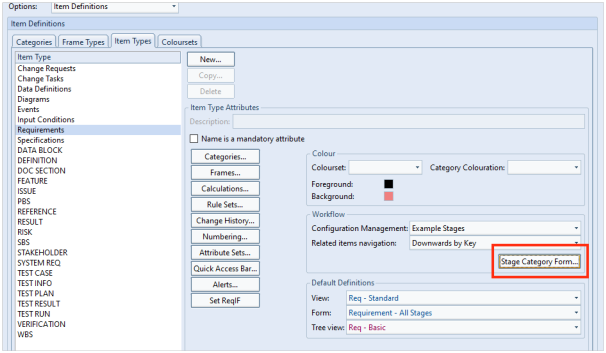
You can then set this as the default workflow for the item type:
Note that the Stage Category Form… button becomes active. We will come back to this later as firstly you need to create a form for each stage.
Creating Forms
Using the Form Details dialog, create a form for each stage of the workflow.
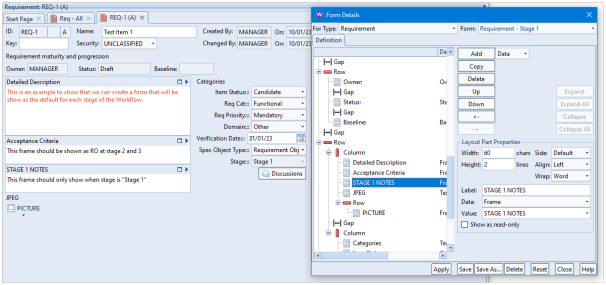
Stage 1 Form
The Stage 1 form in this example should show the frame STAGE 1 NOTES but not STAGE 2 NOTES or STAGE 3 NOTES.
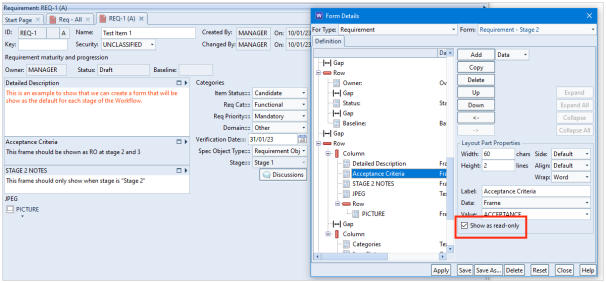
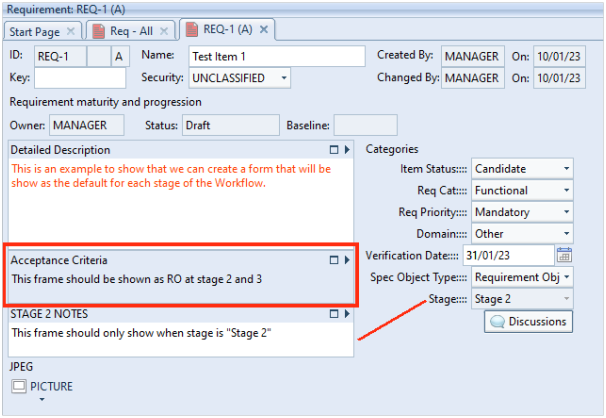
Stage 2 Form
The Stage 2 form in this example should show the frame STAGE 2 NOTES but not STAGE 1 NOTES or STAGE 3 NOTES. You can also set the Acceptance Criteria frame to only be shown read-only as in the example below:
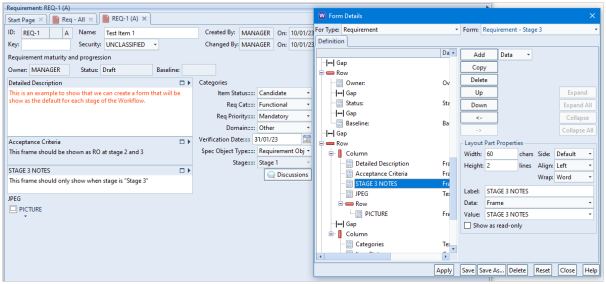
Stage 3 Form
The Stage 3 form in this example should show the frame STAGE 3 NOTES but not STAGE 1 NOTES or STAGE 2 NOTES. You can also set the Acceptance Criteria frame to only be shown read-only as in the example below.
Setting the Stage Forms
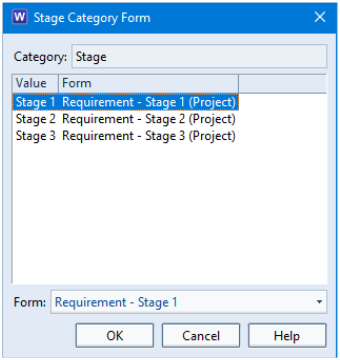
You can now return to Project Setup and press the Stage Category Form… button:
This will allow you to specify the form to be used at each stage of the workflow.
Advancing the Item
When you first create the item, the Stage category is set to Stage 1 as this is the default value for the item. You can see here that the STAGE 1 NOTES frame is shown and the Acceptance Criteria is read-write:
Pressing the Advance… button closes the item and changes the Stage value to Stage 2 once confirmed in the Advance Operation dialog:
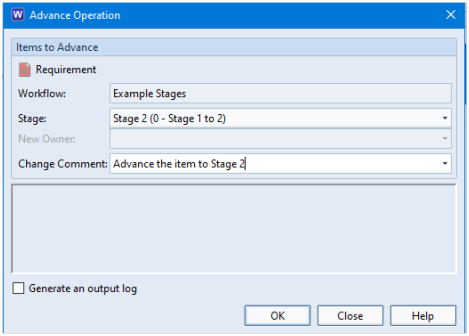
When you open the item again, you will see that the Stage category is set to Stage 2 and will use the Stage 2 form that shows the STAGE 2 NOTES frame and the Acceptance Criteria is read-only:
Advancing the item again uses the form that has been created for Stage 3 and so on.
Summary
WorkBench allows you to create a specific form for each stage of your workflow. This can be particularly useful if the frames, categories or attributes only need to be shown at certain stages of your process. It would simplify the user interface for the users that are modifying the items as they would not be presented with information that might be irrelevant to their task.