Creating Link Rules in Cradle
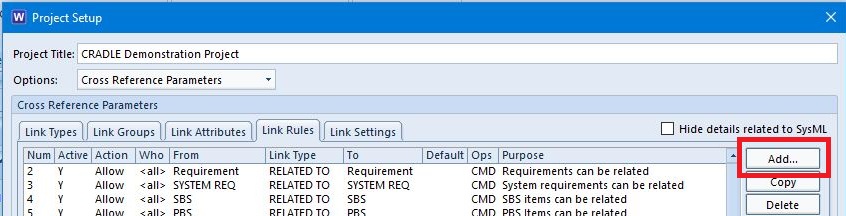
Creating link rules in Cradle is performed in the Link Rules section of Project Setup. If you require more information on how to find this please see the previous post Getting Started with Link Rules in Cradle.
New link rules are added by selecting the Add… button to the right of the Project Setup window.
Selecting Add… opens the Link Rule Setup dialog. The purpose of this window is to select the attributes for our new link rule.
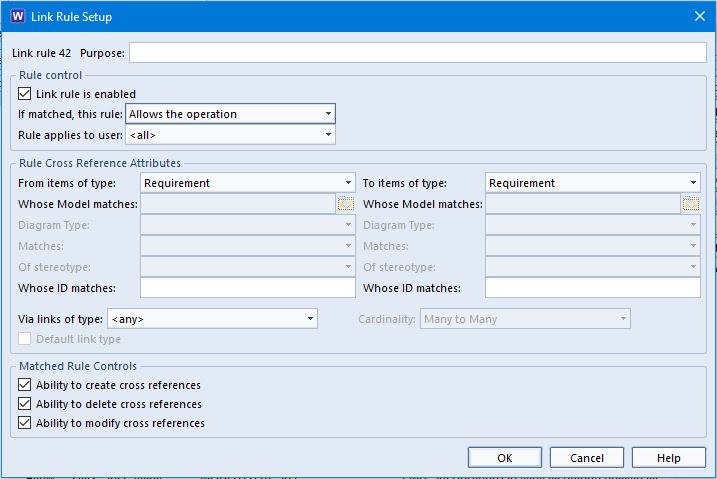
Specifying Options and Attributes in Link Rule Setup
When creating link rules, you need to decide their purpose and to what items/aspects you want them to apply.
Rule Control
- Firstly decide whether the rule is enabled (this allows rules to be written but whether they are applied or not may depend on the stage the current project is at)
- Next decide whether this rule is an ALLOW (Permit the operation) or PREVENT (Prevent operation) action.
- Choose whether this is a blanket rule, or whether it only applies to certain Users, or User Teams.
Cross Reference Attributes
- Pick the item types that this refers to. (If these are model-based there are further options to fill)
- Optionally restrict this to items with a particular ID. (This might be useful if you have an over arching item e.g. “Reference Set External” to which all external references are linked with a special INCLUDES link type which can be made by anyone adding a reference)
- The link type can be specified as any of those defined for the project, or <any> which allows all link types to match, or a Link Group which is a set of link types.
- Choose the cardinality allowed.
- Optionally mark this as the default link type between two specific item types. This will then be the link type chosen when creating cross references between items of the specified type, either to set the UI as default or when no UI option is available for the action.
Matched Rule Controls
This defines what the rule will allow in terms of Creation, Deletion or Modification.
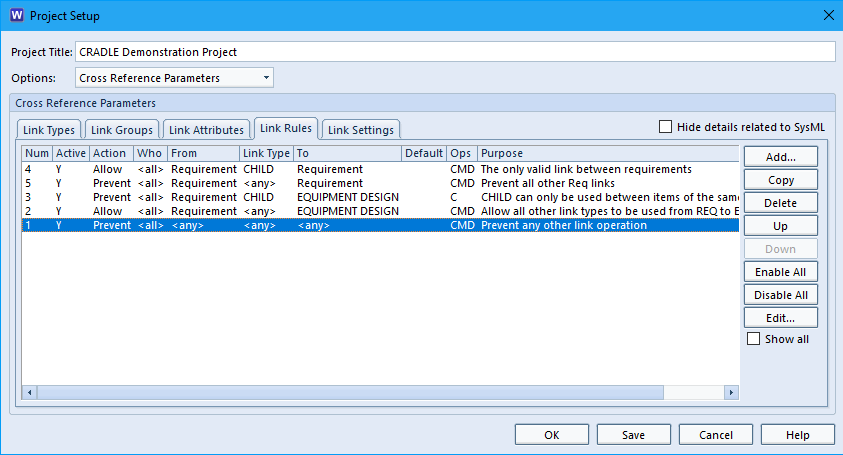
Ordering Rules
When creating link rules, remember they are applied in a top down fashion, the first match wins. If there is a narrow case you don’t want to allow, you may choose to PREVENT this first and then add an ALLOW below it. If there is a narrow case you want to ALLOW you would order this first and then PREVENT everything else.
Example:
To allow Requirements to be linked to any Equipment Design item, with any link except CHILD you would define two rules.
- PREVENT Requirement ⎯ CHILD → EQUIPMENT DESIGN
- ALLOW Requirement ⎯ <any> → EQUIPMENT DESIGN
To allow the Requirements to be linked to other Requirements using the CHILD link, and nothing else a further two rules would be added.
- ALLOW Requirement ⎯ CHILD → Requirement
- PREVENT Requirement ⎯ <any>→ Requirement