Categorisation
In the database each item can have a number of categories assigned to it. These are indexes by which you want to sort and retrieve your items. Some values are plainly single, an item’s Customer Approval can’t be Approved and Rejected at the same time. However, Colours could be Red and Blue on the same item. These are multiple value categories. They are used to classify an item when the attribute itself can have multiple non mutually exclusive values.
The values that can be held by the category are defined in the Project Schema. Each value is allocated to a ‘slot’ each item holds a set of flags indicating which slots (values) are ‘selected’ for that item.
When shown in a View or Form, the values for the slots are shown to the user.

New Cradle-7.2 Project Setup Feature
It’s now even easier to set up multiple value categories in Project Setup.
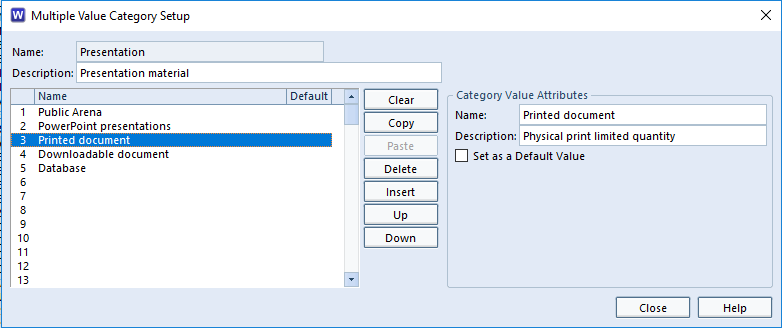
The new options are:
- Clear – Clears the value from the list but leaves the slot blank
- Copy – Copies the selected value
- Paste – Pastes the copied value into the selected slot
- Delete – Deletes the value and all values below this value are moved up
- Insert – Inserts a slot so you can add a value, all values below this slot are moved down
- Up – Exchanges the currently selected slot with the one above it
- Down – Exchanges the currently selected slot with the one below it
There is consequence on existing items in the database for all of the operations above so a warning message will be shown when attempting one of these operations.
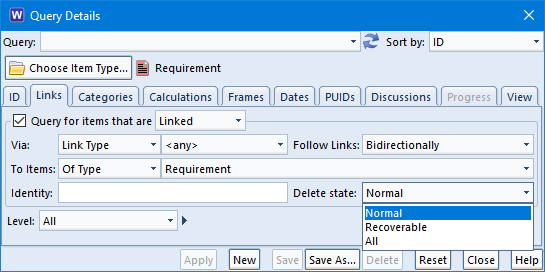
If slots 1, 2, 3 are Red, Blue and Green and item AA1 has flags set for 1, 2 it will be seen as Red and Blue. If a subsequent change is made to the schema (after items exist as drafts or baseline items), making slot 1, 2, 3 Red, Orange, Blue and Green, will result in item AA1 being defines as Red and Orange. This is because the flags tally with the slot. Users should query on existing data to see which items will be affected and subsequently update those they wish to change individually, or using “Item Properties”.