Backups are an essential part of implementing any tool, and particularly Cradle. There are two types of backups that you should consider, each with its own strengths.
What Needs to Be Backed-Up?
A Cradle system can contain many databases. Each database is stored in a single directory. Naturally, you will want to backup all, or at least most, of these database directories.
The project register held in the files proj_reg.* in the root of your Cradle installation:
- Linux: $CRADLEHOME
- Windows: %CRADLEHOME%
reference all of your databases. If you lose these files, or if they are damaged, you will not be able to login to any of your databases. If this ever happens, contact 3SL as we can rebuild these files for you!).
All information related to a database is stored in that database’s directory. But there is some information that is specific to each Windows/Linux user. This information includes the users’ preferences, and any Personal scope definitions (queries, views, forms and so on) that they may have created.
The users’ personal information is stored in:
- Linux: $CRADLEHOME/admin/definitions/personal
- Windows: %CRADLEHOME%\admin\definitions\personal
You should consider backing these up.
Finally, you may have changed some of the configuration files to configure Cradle for your IT environment. For example:
- Cradle startup file, cradle.ini, or .cradlerc on Linux
- CDS and CWS configuration files in the ‘admin’ directory in the Cradle installation on the server: cds_hosts, cds_users, cws_config
- External Command Interface configuration file, eci_config
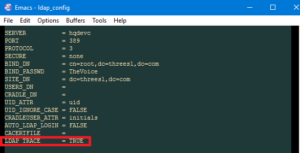
- LDAP and tracing configuration and options files, help in directories called ldap and trace
You may decide that it is easiest to simply backup the entire admin directory and the Cradle startup file in the executables directory.
You should backup all of these files. If you ever need to re-install all of Cradle, then it is easy to use the backup of these files to restore all your configuration work.
Types of Database Backup
There are two types of database backup:
- Image backups, that simply backup the database’s directory, containing all of the database tables and definition files
- Export backups, that perform a full Cradle export on the database, exporting every piece of information into Cradle format. All Cradle versions are guaranteed to be backwards-compatible such that any version of Cradle can import an export file produced by the current version of Cradle, and also any earlier version of Cradle.
We recommend that you run both types of backup.
Image Backups
Image backups are a backup of all of the files and directories in a database.
It is easy to backup your databases if all of the databases have a common root directory. For example, you could store your databases in directories such as:
- /Databases/Active/Test
- /Databases/Active/Production
- /Databases/Active/New-Product
In this case, you could also backup /Databases/Active to backup all of the databases at the same time.
You will already backup information on your servers. So it should be easy to add the Cradle database directories to your existing backup system.
If you want to backup databases directly, then we recommend using tar and gzip on Linux (they are also available for Windows) or either WinZIP or 7-zip on Windows. On Linux, you would use commands such as:
cd /Databases/Active
tar cf test.tar ./Test
gzip test.tar
You may find your system can combine these utilities into one command.
Characteristics
The advantage of an image backup is that it is quick.
The disadvantages of an image backup are that it is impossible to restore an individual item or cross reference from the backup. An image backup contains entire database tables. So the smallest thing that you can recover from an image backup is an individual database table, not an item of information (which is a rows in one or several tables).
Export Backups
Cradle includes a utility called c_io that can perform exports and imports of any, some or all of the data in a database.
For example, the following c_io command will export all of the data in the demonstration database DEMO that is part of all Cradle systems:
c_io -login MANAGER,MANAGER,DEMO -export /tmp/export.exp -type all
You can perform incremental exports using options:
- -from yyyymmdd
- -to yyyymmdd
You can also use the -log option to produce a log file that summarises everything that has been written into the export file.
Characteristics
The disadvantage of an export backup is that it is slow.
The advantage of an export backup is that you can restore any single item or cross reference or definition file from the export.
Resilience and Data Integrity
Of course, you should ensure that your backups are stored on a different server to the server that runs Cradle. Ideally, you should have off-site backups as well.
For those of you who trust your data to third parties, you can store it on a remote server… there are many so-called ‘cloud’ services available.
If you decide to use a third party, please check their terms and conditions. For example, DropBox claims intellectual property rights over everything that you deposit with them. This is not a good idea for your company’s private data!
Backup Frequency
We recommend that you run:
- Image backups twice each day. Take the first backup at lunchtime, to capture the work that everyone has done in the morning. Take the second backup in the evening, to capture the work that everyone has done in the afternoon.
- Export backups once each day. You can run the export backup in the evening when no-one will be working.
- Image backups of the administration files every day, or every week. They are small and the backup will run very quickly.