Want to Login More Quickly ?
If you are operating in a secure environment and have multiple projects, you may want to launch WorkBench faster from a Windows Desktop shortcut.
Configure the shortcut for an individual Cradle user with “-login USERNAME,PASSWORD,PROJ-CODE ” for Cradle’s WorkBench.
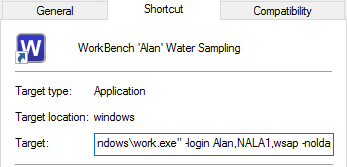
For an even faster connection, you could also specify -cds thus alleviating WorkBench from searching for a server. (Without this parameter WorkBench will broadcast and await a response from an available CDS before connecting)
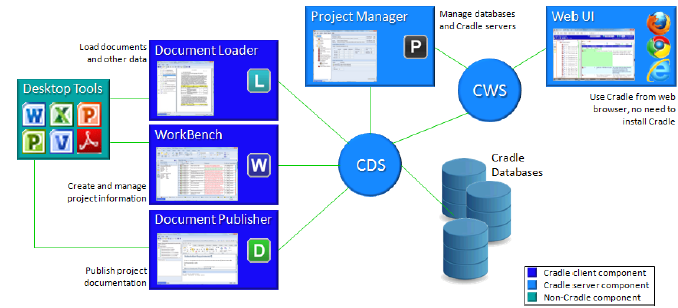
Configure with “-cds HOSTNAME/IP-ADDRESS” and give the host or IP address of the server running the CDS (Cradle Database Server).
If you are running from Linux, you can also use these parameters. When launching WorkBench from the command line use c_work and the -login and -cds parameters.