The Cradle WorkBench UI is divided into panes. Each pane is a region that can contain one or more tabs. A tab is a container with a selectable name and a rectangular area that contains the results of running a query, report, metric or graph, or a single item that is being edited. Using tabs is a way to maximise your productivity with the Cradle UI by helping you to arrange queries, items and other information, either so you can see everything at the same time, or so the information is presented in a layout that you find convenient.
Layout of a Tab
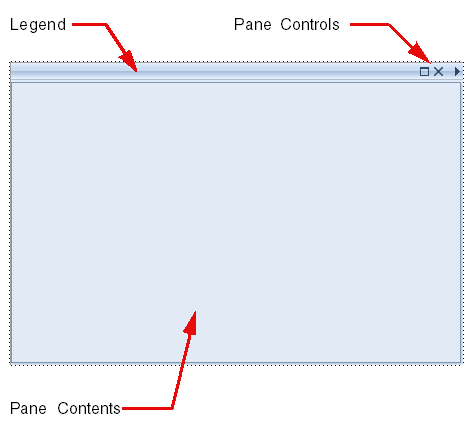
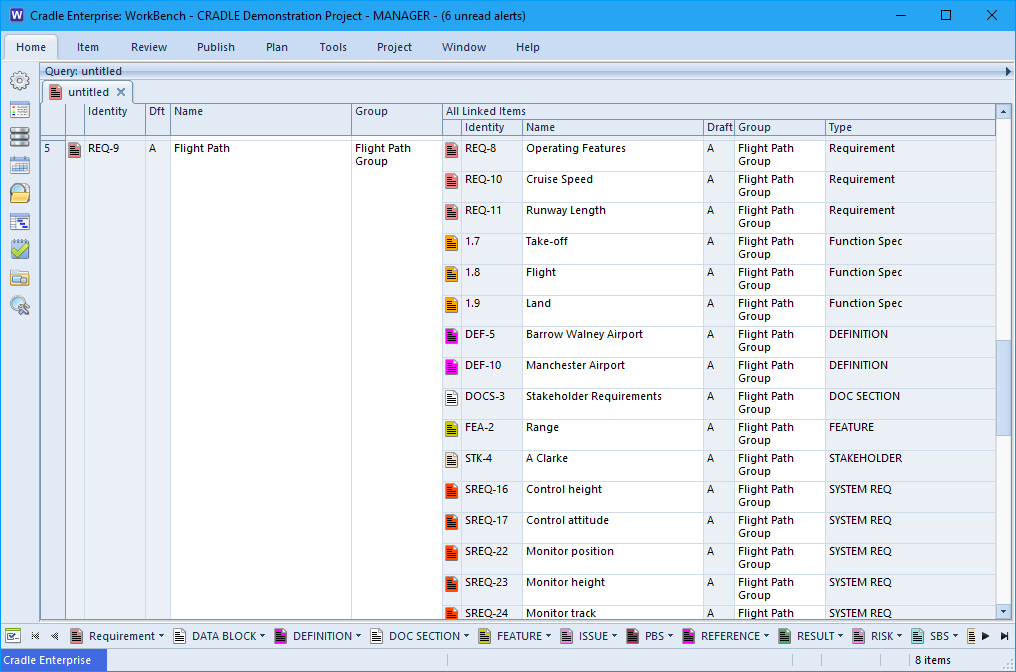
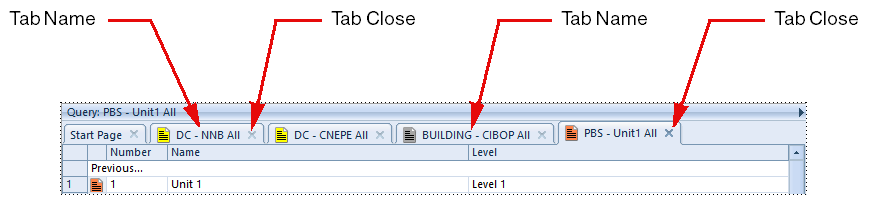
A tab is a rectangular region in the Cradle UI that has a name, a close control and a rectangular region containing the result of a query, a report, a metric, a matrix, a pivot table, or a dashboard:
Tabs exist inside panes.
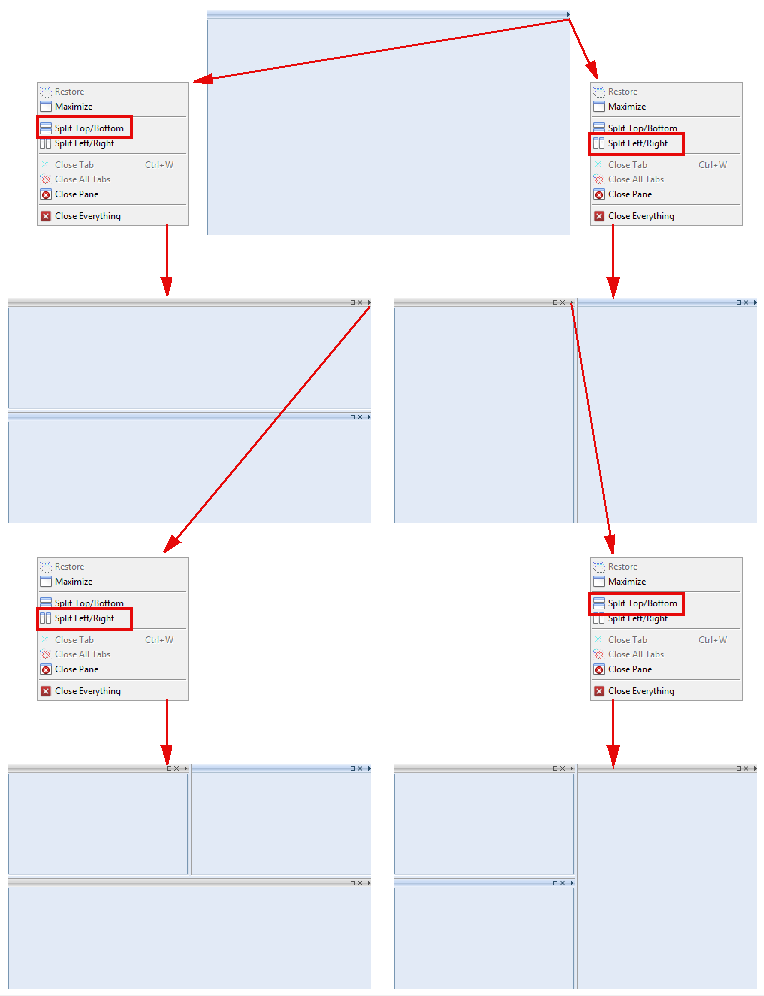
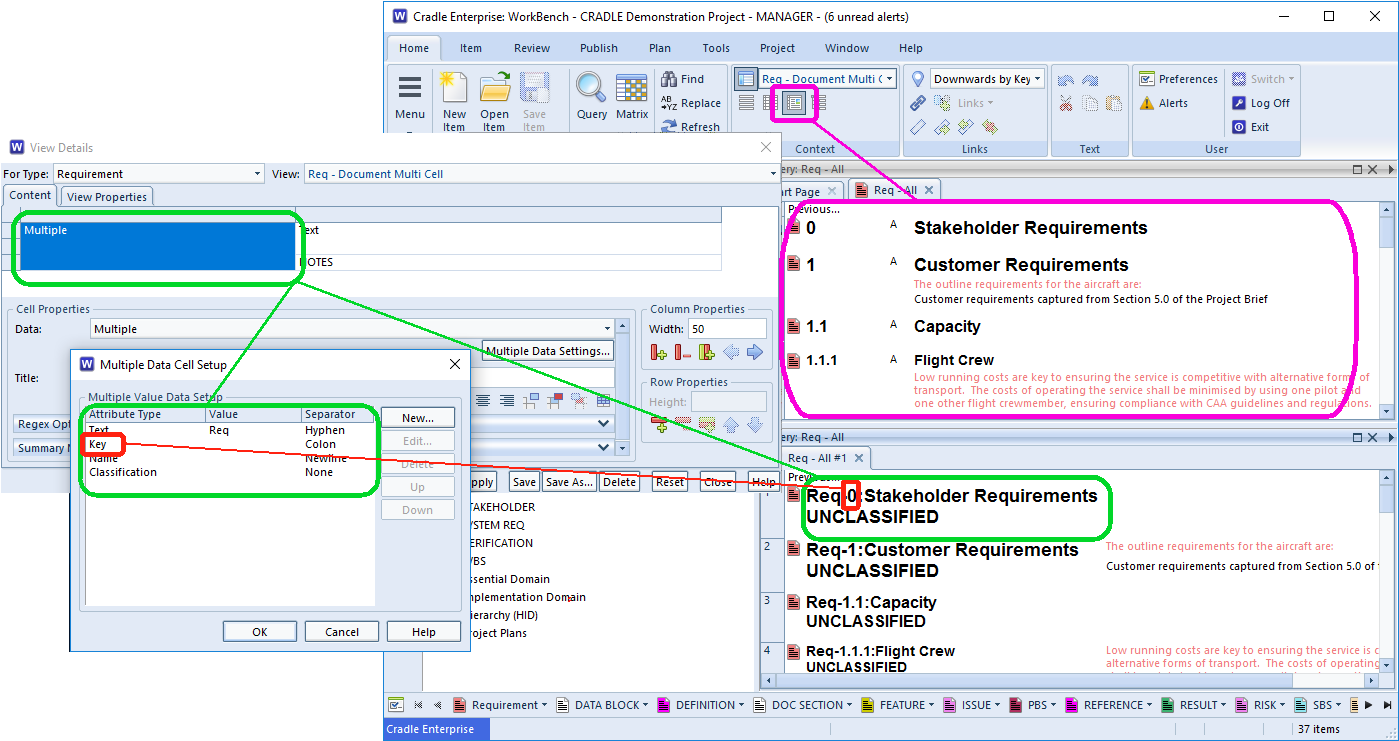
Each pane can contain up to 16 tabs. You can have many panes open in the UI at the same time.
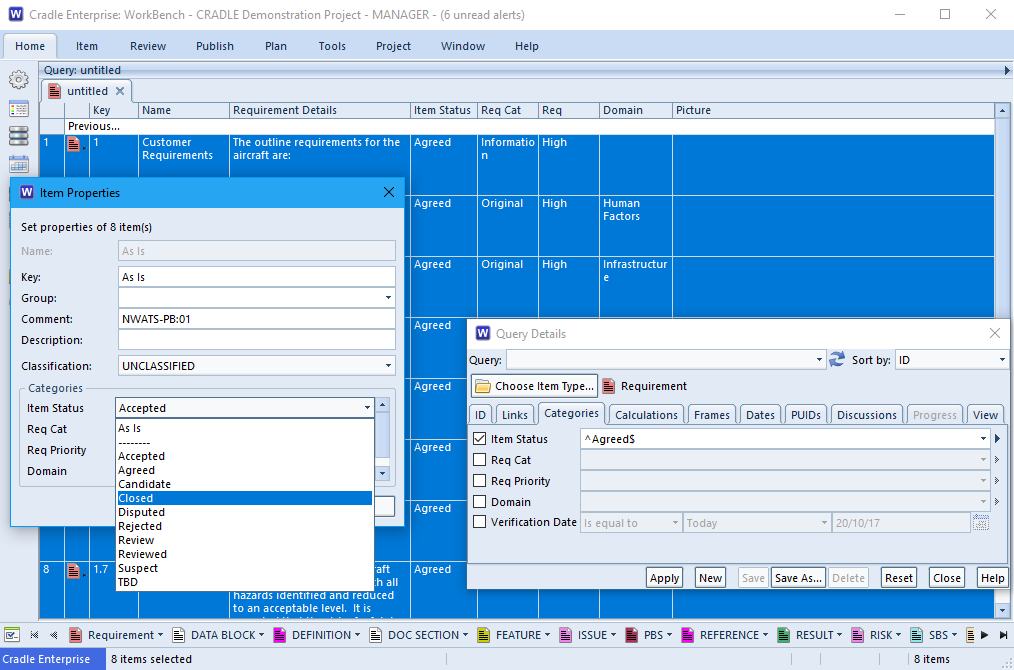
When you create a new tab, it will open in the currently-selected pane. So, if you run a query, that query will open in a new tab in the current pane. If you open an item, it will open in a tab in the current pane.
Tab Names
Each tab has a name, shown above it, that is name of the query, report, metric, graph or pivot table shown in the tab, or some details of the item shown in a form.
Using Tabs
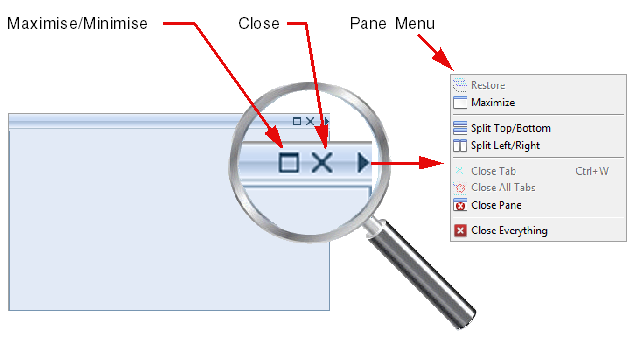
Next to a tab‘s name is a button, you can click this button to close the tab.
You can also press CTRL-W to close a tab, or choose Close Tab from the context-sensitive menu that will appear if you right-click inside a tab.
You can move a tab between panes by:
- Put your cursor in the name of the tab to be moved
- Press the left mouse button
- Drag into the new pane
- Release the mouse button
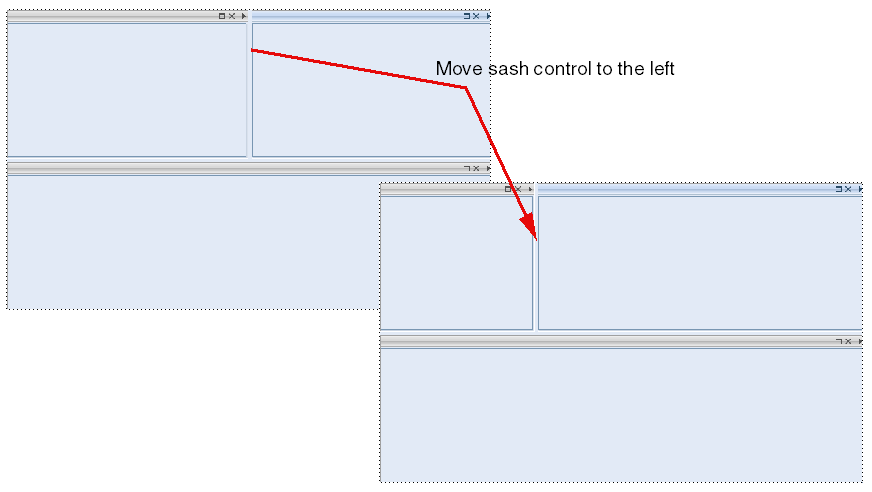
Horizontal or vertical scrollbars will appear if a tab’s contents are larger than the screen area available. You can increase the area used to display a tab by either:
- Use the sash control to increase the size of the pane that contains the tab
- Maximise the pane containing the tab using its pane control menu, or simply double-clicking the pane’s legend