Why use c_io.exe?
Using c_io.exe allows a user to do many things within a project without using the interface and is usually faster.
Using c_io.exe in a batch file means you can do many things while you are actually away from your desk or in the background. You can then add this batch file to be run by a task application during times you are away from you desk or work. This can be handy when needing to do backups of a single or many large databases.
The executable can import and export everything in a project from single items to the whole project. It can use queries or different options to whittle down the required export. So a user can export all items of a specific type or just one to several items based on a query and or other set options.
The user can use also use the import to update or create a new Project schema, items, cross references and definitions.
Import and Export can use the Format Types already saved into the database.
It can also export just a single frame from a single item into a file of the right type and print diagrams to specific print types.
How to use c_io.exe
The only real difference between using a command prompt and a batch file is the user will need to have a path for the executable. At the beginning of each command line the user will need “%CRADLEHOME%\bin\exe\windows\c_io.exe”
As in commandline code, a user will require the correct login information and the project being logged into.
-login <username>,<password>,<projectcode>
For example:
-login admin.ADMIN.demo
As long as the -login user has the correct privileges, they can use c_io.
Different Options in c_io.exe
Required options are:
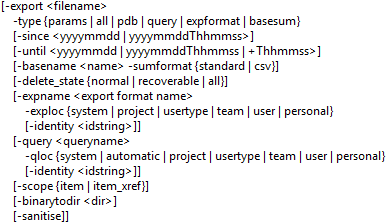
-export
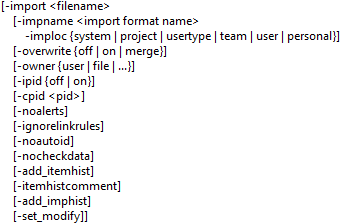
-import
-getframe

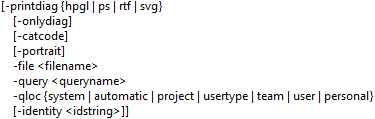
-printdiag
Without any of the previous options, c_io.exe will put up the Information page or an error.
Helpful other c_io options
There are several helpful options especially when using in a batch file.
-log allows a user to specify a name for a log. This is the log that will have the details of the actions performed during the import.
-noldap allows users to bypass using LDAP when running a command line or batch file.
-errorstack option is for logging any issues with the import
“%CRADLEHOME%\bin\exe\windows\c_io.exe” -login admin,ADMIN,demo -export “C:\Temp\all3.exp” -type all -noldap -errorstack -log “C:\Temp\all4_log.log”
“%CRADLEHOME%\bin\exe\windows\c_io.exe” -login admin,ADMIN,demo -export “C:\Temp\pdb3.exp” -type pdb -noldap -errorstack -log “C:\Temp\pdb3_log.log”
Options not used within a batch file
A few of the options are not used in a batch file but are in a command prompt. The reason is that they are only used in a command prompt is that they show pop ups with information on them.
-verbose lets the user know that c_io.exe has finished
-ver lets the user see what the version number, date and time of the build they are using.
-help is used to see all the command line options.
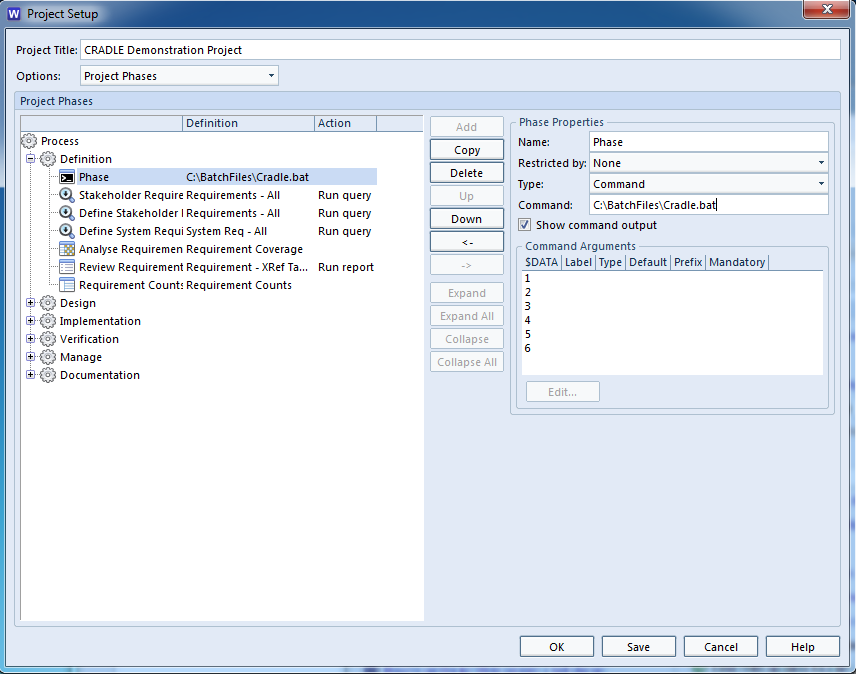
Batch Files from Project Phase
Batch files can be added into the Project Phases, this is done by going to “Project Setup”, and in Options selecting “Project Phases”. Inside here if you create a new Process and change the type to command, in Command navigate to your .bat file.