Item Lists in Document Publisher

Named Item Lists in Document Publisher

When working with large datasets it is sometimes convenient to cache the returned items for re-use in multiple tags. Document Publisher makes this possible using named items lists. These are created from the User Variables dialog.

User Variables Dialog Showing Item List Variable
User Variables Dialog

Creating an Item List

To create an item list you need to:

  1. From an open template select Tools > User Variables
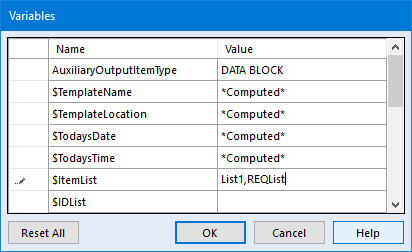
  2. This produces the Variables dialog. Locate the predefined $ItemList entry
  3. Add a new entry in the Value column. This is a comma separated list of all the named item lists in your template
  4. Press OK to save the variable and your item list is now ready to use in a tag

Populating an Item List

Once you have generated a suitably named list you must create a Paragraph Group tag to populate the list.  For further information on how to create a Paragraph Group tag please click here. No output is to be generated from this tag, its sole purpose is to fill the item list for subsequent tags to use.

  1. Create the Paragraph Group tag at an appropriate place in the document, this must appear before the tags which are to use the item list
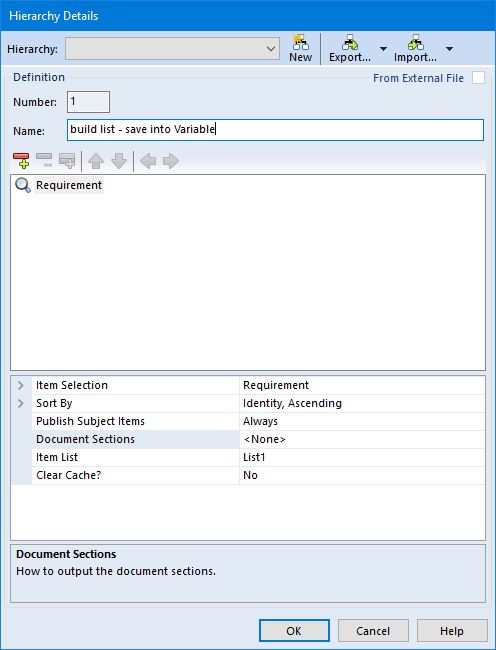
  2. Within Tag Properties find the Hierarchy property and click … to create a new hierarchy
  3. Edit the hierarchy and set the appropriate item selection(s)
  4. For each node set the Document Section property to <None> so that no output will be generated
  5. Select your newly created item list in the Item List property
  6. If the same list is being filled multiple times then set the Clear Cache property depending on if you want to refill the list from scratch or append to the existing list
  7. Press OK to save the hierarchy
Hierarchy Dialog showing Item List
Hierarchy Dialog

Please note that duplicate items are automatically removed from item lists as they are filled.

Using an Item List

Once a Paragraph Group tag has been setup to fill your item list, it can be used by any tag appearing after it in the template document.

  1. Create a Paragraph Group or Table tag at an appropriate location in your template
  2. Set the tag‘s item selection to match what information is stored in the item list
  3. Optionally, create a hierarchy to follow from the items stored in the list
  4. Optionally, override the Sort By property if it needs to be different from the item list sorting order
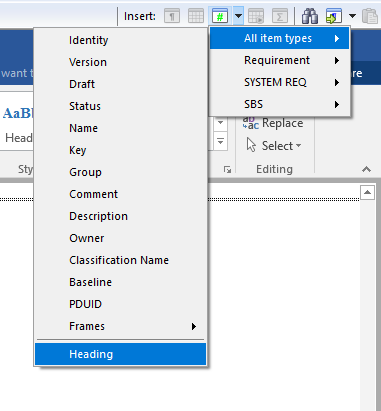
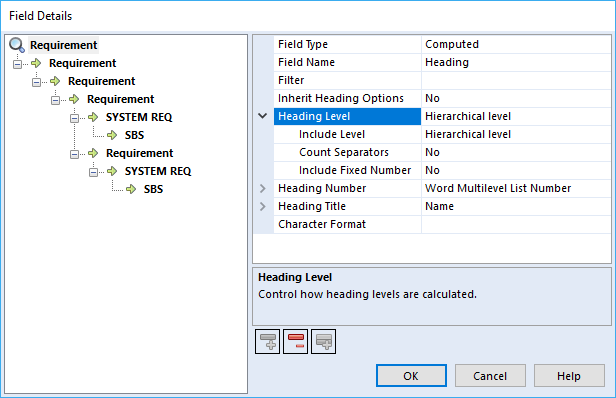
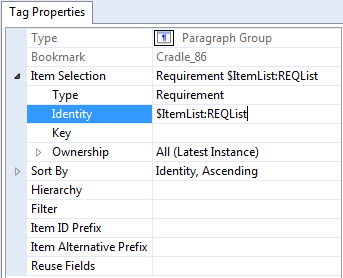
  5. Expand the item selection and set the Identity property as shown below, using the special value $ItemList followed by a colon and then the name of the list to use it
Tag properties showing $ItemList
Tag Properties

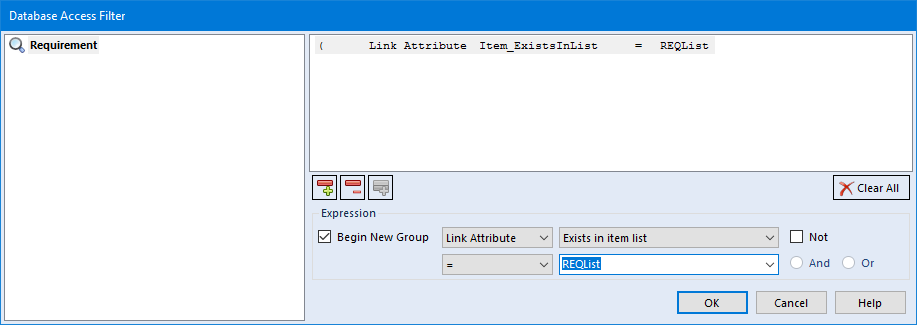
Referencing an Item List in a Filter

There are two special filter properties that can be used to check for the existence of items stored in an item list. These are available in the Filter dialog as Link Attributes:

  • Exists in Item List – where the filter expression will evaluate to true if the item exists in the named item list
  • Is Linked to Item in Item List – where the filter expression will evaluate to true if the item is linked via a specified link type to an item that exists in a named item list
Database Access Filter Dialog showing $ItemList
Database Access Filter Dialog
Article Updated 04/02/2019 – Incresed image sizes

Defining a Heading Tag in Document Publisher

In Document Publisher you can define headings in several ways; this post will show how to define the Heading tag.

Before starting, Word’s Multilevel List needs to be set; use the list which has Numbering and Heading set:

Multilevel List options
Word Multilevel List options

This will give the user a Heading style which numbers the names of the items output.

Add a ParagraphGroup tag and create your Hierarchy table and set the Key or Identity in the Item Selection.

Default Settings for the Heading Tag

Placing cursor at the end of the word ParagraphGroup in the tag but before the bookmark, click on the arrow for the Field tag button and select the All item types option and then down to Heading tag option at the bottom.

Heading field tag
Selecting the Heading field tag

The Field Details UI will look like this when it opens:

Field Details User Interface
Field Details User Interface with the default settings

This is where the user sets the Heading tag options for each row, starting with the top row. Leaving all the options as set for each row will give the user the following output:

1  Stakeholder Requirements
1.1  Customer Requirements
1.1.1  Capacity
1.1.1.1  Flight Crew
1.1.1.1.1  Corrective Maintenance (Air)
1.1.1.1.1.1  Fault Monitoring System
1.1.1.1.1.2  Pilot
1.1.1.1.1.3  Co-pilot

Basing the Heading Level on the Item Attribute Key

The user may require that the sections start with a different number for example they may wish to use the key instead for the Heading tag.

The Word’s Multilevel List is not needed to be set for this option as the numbering is set by the Key.

Setting the Include level to No and Count Separators to Add and the Attribute to Key, the type of Separator will now not use the Hierarchy Level in the output but base the numbering on each items Key.

The user can set each of the other rows to the same settings as the top row by select the row, clicking the Remove Field button Remove Field Button and then the Copy Field button Copy Field.

The Field Details UI
The Field Details using the Key not the Hierarchy Level

This will give the user the following type of output; remember the Key starts at 0 but the Heading numbering in the Heading Styles starts at 1:

1  Stakeholder Requirements
2  Customer Requirements
2.1  Capacity
2.1.1   Flight Crew
2.1.2  Corrective Maintenance (Air)
2.1.3  Fault Monitoring System

Using the Separator Option

This option allows the user to change to which separator is used within Key or attribute the user has decided to use

Using the include Fixed Number Option

The user can use an Include Fixed Number of separators and Add or Subtract the number of separators for a different output. If the user sets it to Add and the Fixed Number to 2, it will add 2 separators to the key and the output will look like this:

1.1.1  Stakeholder Requirements
1.1.2  Customer Requirements
1.1.2.1  Capacity
1.1.2.1.1   Flight Crew
1.1.2.1.2  Corrective Maintenance (Air)
1.1.2.1.3  Fault Monitoring System

If the user set it to Subtract and the Fixed Number to 1 the output will look like this:

1  Stakeholder Requirements
2  Customer Requirements
3  Capacity
3.1  Flight Crew
3.2  Corrective Maintenance (Air)
3.2.1  Fault Monitoring System

Note: Don’t use subtract on rows where the key is only a single digit as the numbering will not be output, showing up like this:

Stakeholder Requirements
Customer Requirements
Capacity
1    Flight Crew
2    Corrective Maintenance (Air)
3    Fault Monitoring System

Using the Hierarchical Level with an attribute

The user can use the Hierarchical Level with the Key which will add the key to the level in the hierarchy and the output will show like this:

1.1  Stakeholder Requirements
1.1.1  Customer Requirements
1.1.1.1.1  Capacity
1.1.1.1.1.1.1   Flight Crew
1.1.1.1.1.1.1.1  Corrective Maintenance (Air)
1.1.1.1.1.1.1.1.1  Fault Monitoring System

The other attributes the user can use to the set the level with or without the Hierarchical level are Identity, Group and a Category. When Category is selected a new option shows to let the user pick the category they wish to use.

Using the Heading Title Option

The Heading Title option allows the user to use different sources to name the item being output. The option include:

  • <None>
  • Static text
  • Identity
  • Key
  • Group
  • Name
  • Comment
  • Description
  • Category
  • Frame

The Category and Frame options allow the user to select from a new option which category or frame they would like to use.

Using the Strip Prefix

This option allows the user to remove any specified text from the attribute during output. For example, the items Key may be REQ-1.1 and the user only requires the 1.1. The user would enter REQ- in the Strip Prefix option to have it removed.

Using the Character Format Option

This option allows the heading style to be overridden but not the numbering. If the user decides that the second and fourth levels should look like the style Subtitle, it will have the font, size and colour of Subtitle but still the numbering set to Heading 2.

Field Details Character Format Option
Field Details Character Format Option using the Subtitle style

Using this option the output would look as below:

Character Formatting using Subtitle
Shows the second and fourth rows with the Subtitle style

This style will also be reflected in the Table of Contents:

Character Formatting in the TOC
Character Formatting in the Table of Content

Create a Document Output

Produce Documents From Your Cradle Data

Produce documents from your Cradle data, launched straight from WorkBench.

Document Publisher is an automated document output tool that interacts with Microsoft® Word. It is used to produce professional high-quality reports from the information held in a Cradle project database (PDB).

Document Publisher works by combining a user-defined template with information held in your project to generate dynamic content including, hierarchical headings, paragraphs of body text, tables, diagrams, figures and embedded data.

Full control is provided for paragraph styles, section numbering and captions.

Powerful data filters and parametrics can be defined to supplement database querying. Conditions under which particular attributes are to appear in the output can also be specified.

Document Publisher can be launched directly from start menu, or from within Cradle WorkBench.

Whist the video above shows a draft document being produced, formal document versions can be produced as described in How to publish formal project documents.

Full End to End Document Processing

Concept to Creation

Whatever you are making, whatever service you are delivering, you need a tool that supports your process from end to end. You can’t expect a successful outcome without control of your project’s lifecycle.

Complete End to End Document Processing

Despite living in an electronic world, where the promise was a paperless office, we are often faced with needing to manage documents at a number of points over the duration of the project. This is not surprising, even if we don’t handle hard copy,  a document is an tangible object.

Humans relate to the concept of a complete package of information being contained in the document. They generally make good reading if you start at the beginning and read through to the end. Non-fiction documents may be more likely to be read by accessing the index or contents and turning to a page number. Sometimes in an electronic copy there may be a hyper-link to another part of the document. On the whole, however, the format is fixed. You can’t easily re-arrange a document to see its contents from a different perspective, or organise it hierarchically based on a section of your choosing.

Managed and linked requirements, designs, constraints, tests, diagrams and definitions, need to be arranged, searched and traced, to reach our end goal effectively. The ability to see which customer requirements are ultimately verified by a test, or what system requirements are impacted by a customer change to a requirement are invaluable.

Cradle for Your Document Processing

From a document point of view, the triplet of Document Loader, WorkBench and Document Publisher covers the full lifecycle.

  • Customers often provide their initial requirements in the form of a MS Word document. Document Loader will parse, tag and link this information as it is drawn into Cradle’s database.
  • WorkBench is the ideal tool to develop and design, record and trace your project.
  • When the project is at a stage that needs a formatted output, Document Publisher is used.

Continue reading “Full End to End Document Processing”

Avoid Problems Comparing Versions of Formal Documents

Most Cradle users publish documents. Many users publish formal documents. When a formal document is published, Cradle:

– Increments a version number for that document, each formal document can exist in many versions
– Keeps a permanent copy of the document in the database
– Updates a register of formal documents with the title, issue, issue date and reference of the new version of the formal document
– Keeps a record of which item instances have been published in that version of that document, so if an item is to be changed, you can see the documents where it has been published so you know which formal documents need to be reissued

You can compare versions of formal documents. This uses Word’s document compare feature that shows the changes between the formal document versions with change bars, underlined and strikethrough text.

But, Word has a problem comparing large and/or complex tables in such documents. This problem affects Word 2007, 2010, 2013 and, we suspect, 2016. You will see the problem as a small dialog with the message ‘Word was unable to compare the documents’.

There is a solution to this problem that works for Word 2007, 2010, 2013 and, we expect, 2016. The solution is to create a new key in your definitions in the Windows registry. You may be able to edit the registry, or it may be limited to your IT. Be careful if you edit the registry as you can seriously damage Windows.

The solution is:

– Start regedit, for example, press Windows+R, enter: regedit and click OK
– Find the key: HKEY_CURRENT_USER\Software\Microsoft\Office\<office version>\Word\Options
Where <office version> is 12.0 for 2007, 14.0 for 2010, or 15.0 for 2013
– Select: Edit -> New, and choose: DWORD (32-bit) value
– Enter the name for the new key: DocCompareLargeTables
– In the regedit UI, select the new key, right click, choose Modify, enter the value: 1 and click OK
– Close regedit

We hope that this is helpful!

Cradle Document Publisher

Document Publisher Templates Reference Word Templates

We have recently seen cases where a Document Publisher template – which is an ordinary Word document – contains references to other Word templates that have been created by an organisation.

Generally, this is OK, everything works correctly as you would expect.

However, if the Word templates (.dot or .dotx files) are not available, or are corrupted, then problems can occur because Word (running inside Document Publisher) may display error messages and prompt you to re-try access to the template, or repeat an attempt to save changes back to it, and so on.

You can either accept that these messages will occur over and over again, or you can disconnect your Document Publisher template (the Word document) from the Word templates.

It is difficult for us to offer general advice as every organisation is different, but our inclination would be to sever connections to these Word templates if you ever seen any warning or error dialogs from Word.

Some notes on this topic can be found here:

https://support.office.com/en-us/article/Load-or-unload-a-template-or-add-in-program-2479FE53-F849-4394-88BB-2A6E2A39479D

We hope that this is helpful!