Items are the basic units of Cradle PDBs. Each piece of information, whether it is a requirement, a function, a component, an interface or a risk is an item of a corresponding type.
You may need to change attributes or a category of many items and there is an easy way to do this in one go.
Changing Attributes
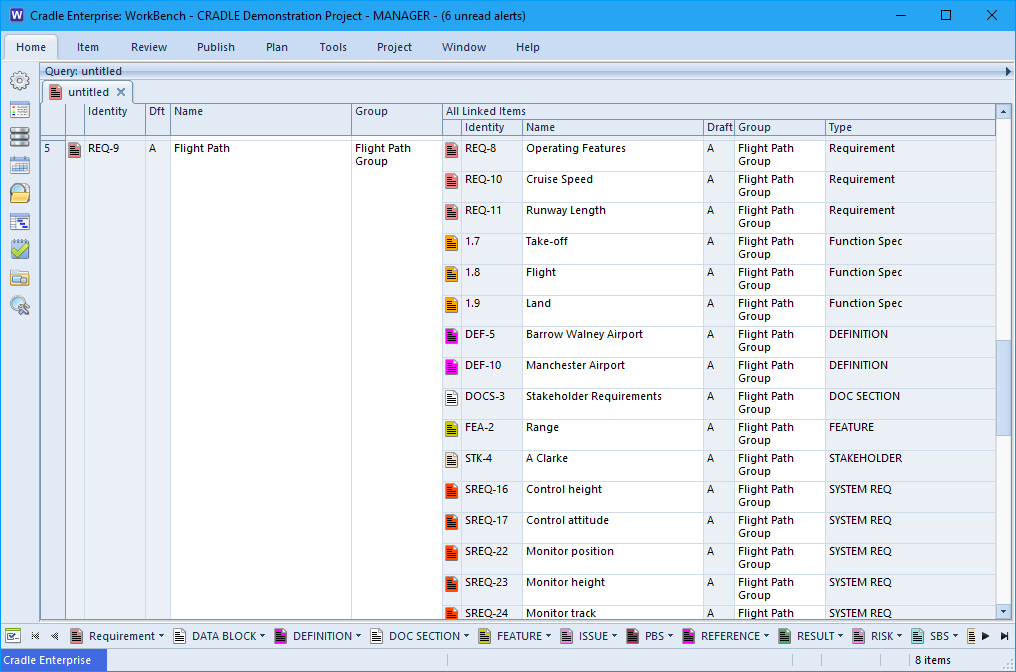
The attributes of the same or different item types can be changed at the same time. In the image below, all the Group attributes are empty and I want to group this set of items. To change attributes, select them all, right click and select Properties.
Item Properties UI for Many Item Types
In here I can enter some text in the Group attribute and when I click OK all the items selected will be up dated. I could change any of the options shown in Item Properties and it would up date all the items with the same information.
Many items of different item types are updated
This will work on items in link views as well so you can change all of the linked items at one.
Changing Categories
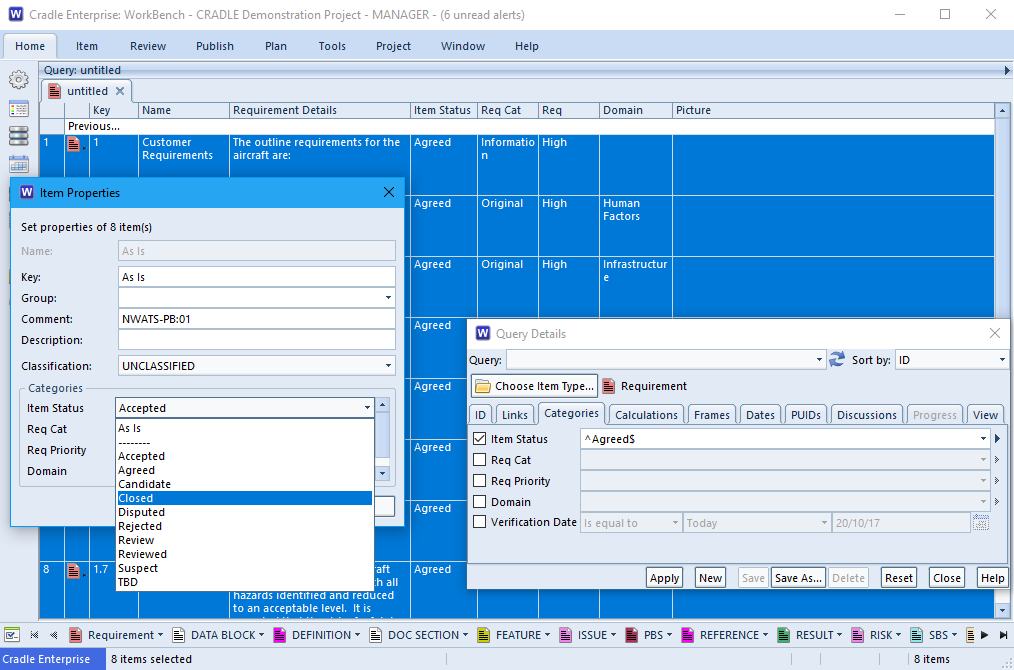
This will only work for items of the same item type. Select all the items you wish to change, right click on them and select Properties. If all items are the same type with the same categories, Item Propertieswill show all of the categories for that type.
Item Properties for many selected items of the same item type
Selecting a new option will change all the items at the same time. Multiple Category types can also be changed here and will affect every item selected. All of the categories can be changed at the same time, if required, along with all the attributes shown above.
Related Articles:
For further information on attributes and altering data:
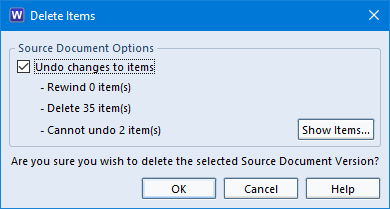
Source document versions can be deleted from the Project sidebar, the same way as regular items. When you delete a source document version, all cross references (source statements) to the captured items are also deleted. Previous versions of the source document and their cross references (source statements) are NOT removed.
Delete Items Dialog
WorkBench only shows the most recent version of a source document. So for example, if you were to delete version 4 of a source document, then version 3 will now be the latest version and will be shown in the Project sidebar.
If you delete version 1 of a source document, then the source document is unregistered and deleted from the PDB altogether.
For further information on how to delete source document versions please click here.
Deleting Formal Documents
Deleting formal documents is similar to deleting standard Cradle items.
When a version of a formal document is deleted, Cradle will:
Delete the Word document stored inside the formal document
Remove the formal document
Delete the records that associate specific item instances with that version of that formal document
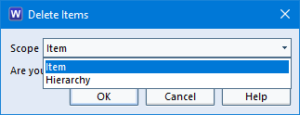
When deleting items you are presented with options that relate to the scope of the operation. The scope determines whether just a single item is deleted, or an item together with its supporting definitions, or an item and the hierarchy of items linked to it by cross references.
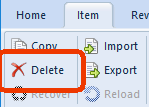
Delete Items dialogDelete
You can delete any number of items at the same time (in WorkBench, items can be deleted one at a time through Web Access). You must have read-write access to an item to be able to delete it is available through the context menu (right-click) or on the Item menu.
When you delete the last instance of an item, that is, if there are no more versions or drafts of the item after it has been deleted, and the item isn’t in a recoverable state, Cradle then automatically removes all cross references to and from the item. This ensures that there are never any dangling cross references in the database, that is cross references to or from items that do not exist.
The Delete operation has the same scope option as the Copy operation, with the same possible values and meanings. These are:
Item – delete the item only
With Definitions – delete the item and it’s definitions
Hierarchy – delete the item and it’s hierarchy
Please note the DELETE_ITEM privilege is required to delete items in the database.
If you are worried about a user being able to delete an item, it is possible to restict this user from this privilege, this is done via the “User Setup Privileges and Rights”
It is usual to delete items when they are in a draft state. This is where the item is still in a fluid state and alterations are occurring frequently. When applying formal control (Configuration Management*) to a project, it’s normal to superseded or retire items when they are updated or no longer required. This maintains the full traceability through the project’s development. An overview of this formal control is detailed in the Cradle Help.
Changing an item may impact related items. For example, changing a stakeholder requirement may necessitate changes to the system requirements linked to it, cascading the change to the product configuration items.
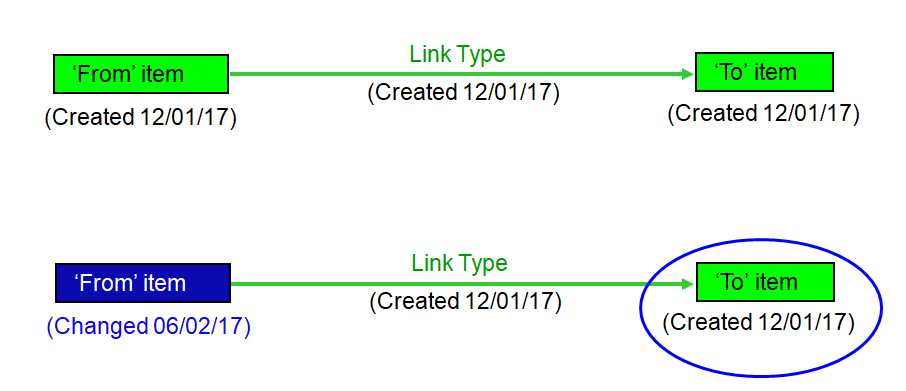
Item integrity shows items that are ‘suspect’
Items are classed as suspect when an item changes after a link was made:
As the ‘from’ item has been modified the ‘to’ item becomes suspect
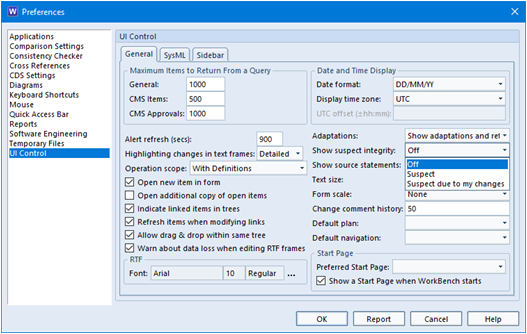
Cradle provides three methods of showing items that are suspect which can be set/chosen in Preferences, these methods are:
Off
Suspect
Suspect due to my changes
Item integrity options in Preferences
If you enable Suspect or Suspect due to my changes in preferences, suspect items will be shown in red.
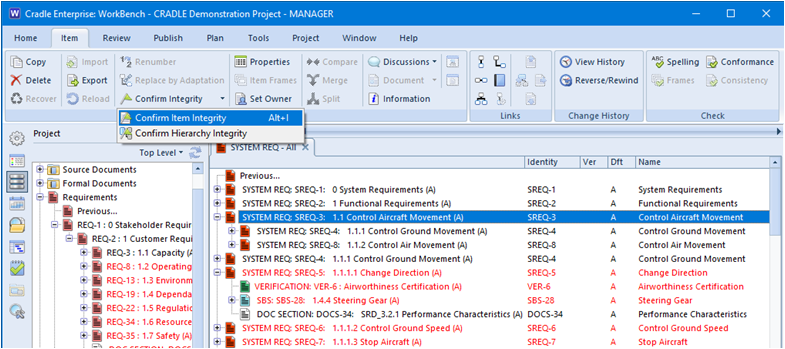
Confirming Integrity
Once you have reviewed the item suspect item there are two courses of action. One to change the item to comply with the changes ‘further up the hierarchy’, or just to confirm there are no changes needed. Integrity can be confirmed by a user-with read-write access, confirming integrity is recorded in the item’s change history.
Confirm item integrity
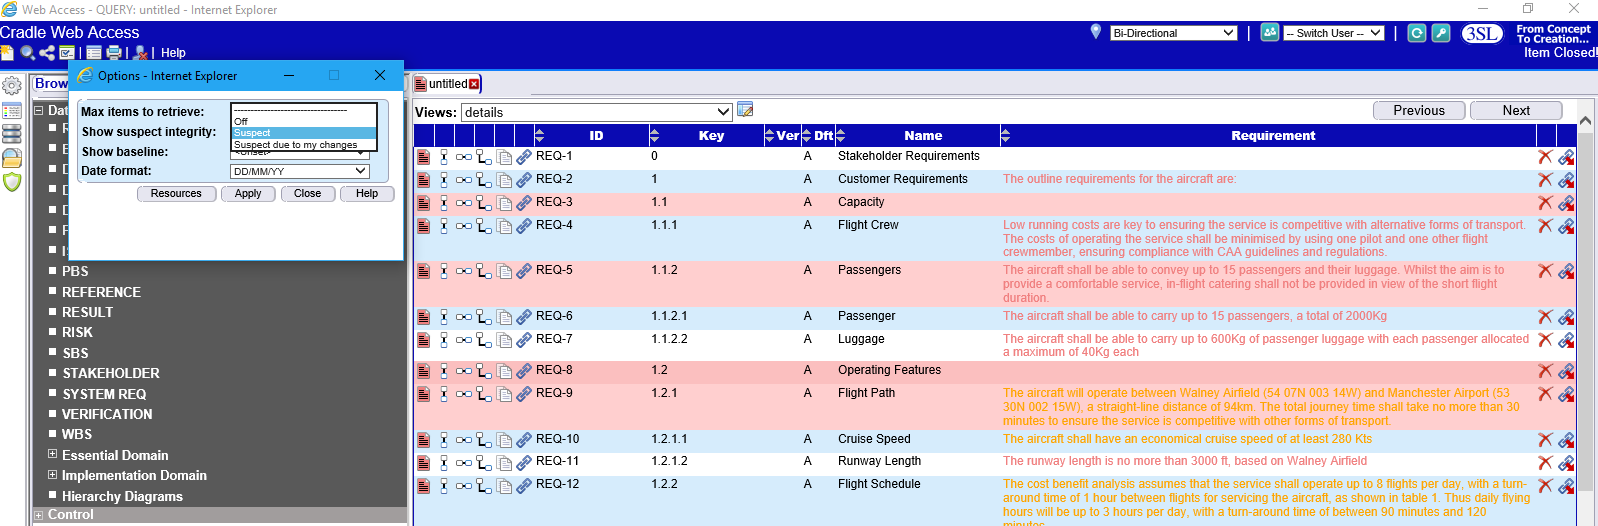
You also have the option to view suspect item in WebAccess you have to choose your method in options but items will be highlighted in red in queries if they are classed as suspect.
Enabling suspect integrity in WebAccess
Article Updated 04/02/2019 – Moved image and give example of when an item would become suspect
Did you know you can Colour Code your Frames to match the Priority you have set in Categories?
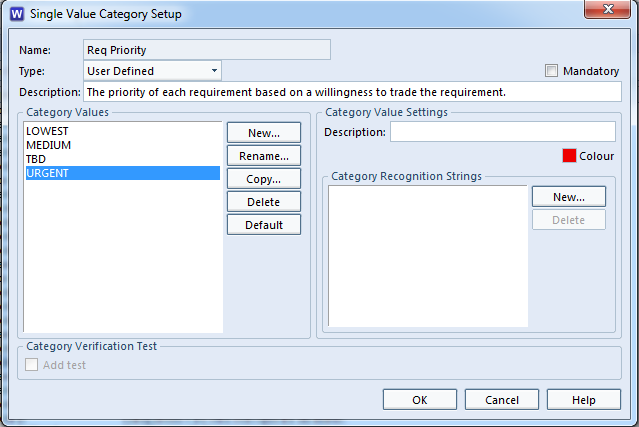
To enable this colour code you will need to navigate to Project Setup, inside here go to Item Definitions – Categories. For my example I have used Req Priority, in my Category Values I have :
URGENT – Red
MEDIUM – Orange
LOWEST – Yellow
TBD – Blue
Single Value Category Setup
Ensure you have assigned this Category to a Frame in an Item Type. For my example I have put mine into Item Type – Requirements and the Frame is TEXT
As you can see in my example, whenever I change my Req Priority the text colour changes in “Detailed Description” Frame.
For further information regarding Frames click here
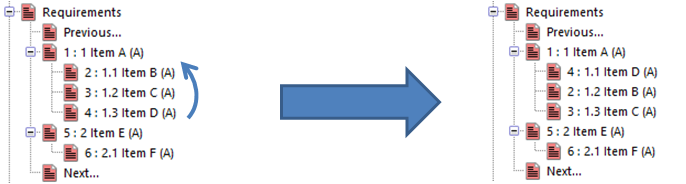
Hierarchies are seldom created in a single operation. It is more usual for you to create a hierarchy interactively, gradually developing the hierarchy item-by-item. It is also very likely that the hierarchy will need to be reorganised, to reorder items as it is being built, for example:
To add a new top-level item into the hierarchy and move existing items below it
Move individual items to a different position in the hierarchy
Move sub-trees in the hierarchy upwards, downwards, or to any other new position
We term this process of rearranging – “reordering”. Cradle fully supports reordering using drag and drop.
To enable this feature:
Items must be of the same type (system notes or requirements)
Auto-numbering must be selected for the item
Items must allow hierarchical numbering using Key
CREATE_XREF and DELETE_XREF privileges needed
Set the preference “Allow drag and drop in same tree”
A navigation that sorts by Key
Reorder items
Why we use hierarchies
Hierarchies are useful to show the users of a project a view of the Top level item and all its branches, and with Cradle it is easy to join many hierarchies into one, you can create a new top-level item and connect hierarchies to it.
For further information on reordering please head over to our online help.
Article Updated 04/02/2019 – Added why we use hierarchies
As a project progresses a requirement can grow from being atomic to containing multiple phrases and components. From an implementation or verification point of view this makes work increasingly difficult. It is necessary to split items like this into smaller parts. Making them into hierarchical items ensures clear and concise elements. However, it would be laborious to cut and paste the individual elements into new items and create the links back to the parent.
The Split utility is an operation available for requirements, system notes and specifications. It splits an item’s text frame into several parts and creates a new item in the database for each of these parts according to a user-selected regular expression as one of:
Newline
1) / 2} / 3.
1.2 / 2-3
a) / b}
i) / iv} / ix.
Item split dialog
Each of the new split items is a copy of the original item and they are cross referenced back to the original item with a specific link type. The frame content of the original item is unaffected by the split. If change history is enabled for the item type an entry is placed in the change history log. Note: The CREATE_ITEM privilege is required to use the split option. The Frame Setup dialog in Project Setup allows you to set the destination item type, destination frame and the link type to be used when linking the split items back to the original item.
The reason you would split an item instead of copying the item, is the split items text frames can be broken down into multiple items.
If you re-split an item using a different link type new items are created.
If you re-split an item using the same link type which would result in fewer items, all existing items are updated and any additional items are deleted.
Lastly if you re-split an item using the same link type which would result in more items, all existing items are updated and any new items are added.
In an ideal world we would design the project schema first and then run our project from that point on. However, that’s not always how real life pans out, changes post ‘work starting’ can create questionable item integrity.
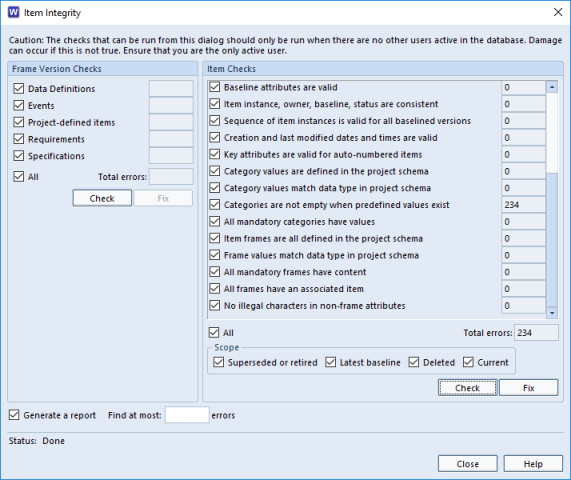
Cradle’s WorkBench Item Integrity checker allows an authorised user to check the status of items in the database. The thorough check ensures each item’s attributes are consistent with the schema and valid. It highlights areas that need the database administrator’s attention.
These issues may have been created in a number of normal operational ways.
Altering the schema after these items have been created and saved.
Importing items whilst overriding data validation. (In order to get items in to the database, so that they can be edited it is quite logical to want the old value to remain. The user then has a chance to view and edit and save with the new parameters).
Creating, say, a hierarchy of items and subsequently not editing them to fill in all required category fields or filling mandatory frames with content. (It would be most laborious to be forced to fill each one at the time of creation. It is better allowing a hierarchy to be created and then subsequently edited)
Item Integrity Checker
New Cradle-7.2 Item Integrity Fix Feature
A Fix button has been added to the Item Checks section of the Item Integrity Checker. This button only apply to certain checks. These checks are shown below with details of what happens when the Fix button is pressed:
Check
Fix Operation
Category values are defined in project schema
Clear the category values.
Category values match data type in project schema
If it has a default value, set it to this value, otherwise don’t do anything, i.e. this cannot be fixed using the Fix button.
Categories are not empty when predefined values exist
If it has a default value, set it to this value, otherwise don’t do anything, i.e. this cannot be fixed using the Fix button.
All mandatory categories have values
If it has a default value, set it to this value, otherwise don’t do anything, i.e. this cannot be fixed using the Fix button.
Each Cradle database contains different sets of information. These can be imagined as layers, where each layer uses the data in the layers below it. For example, cross references cannot exist until the items exist whose relationships are shown by the cross reference. These layers are, highest to lowest:
1. Cross references – the links between the data 2. Items – the data 3. Definitions – how to find, view and report the data 4. User profiles – who can own and access the data 5. Schema – the structure of the data You can export/import each layer individually, or in any combination, or all layers. You should only import a layer of information if the lower layers already exist in the database (unless you know that it is safe).
To initialise a new database from an existing database, you need as a minimum:
– The schema – Definitions
User profiles are needed to use a database and may be needed for some parts of the schema (such as workflows and alerts) and definitions (user and personal scopes).
The structure of each Cradle database is defined by it’s schema. This contains many parts, but the most fundamental are the ‘item types‘ for the types of information that Cradle will manage and the category and frame attributes of these item types.
Item Types, Categories and Frames
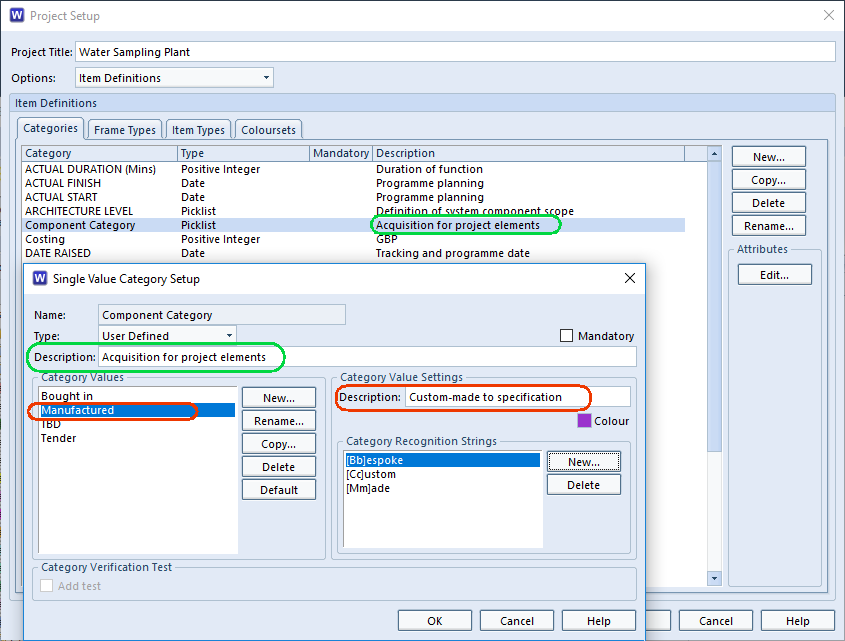
When you define the schema, you can specify a ‘description‘ for all of these parts, including:
Item types
Category codes
Each value in a category code that is a pick-list of value(s)
All frames
Schema Descriptions
Setting Schema Descriptions
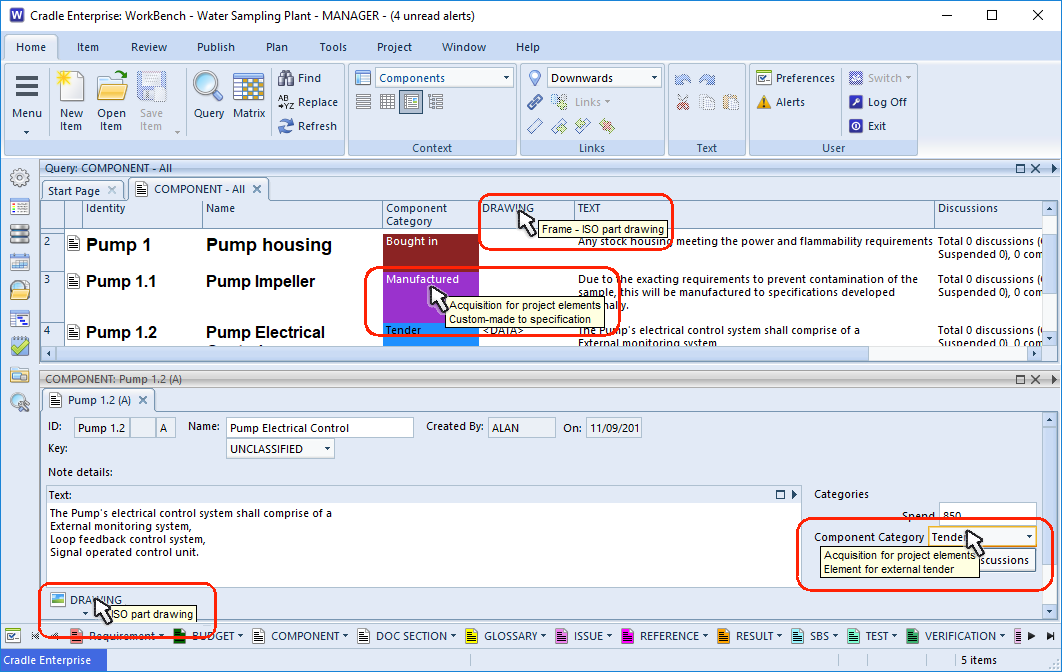
These descriptions are very useful to end users, because Cradle will display them as tooltips in the UI (User Interface). For example, when the user moves to set a category value, Cradle will display:
Category and Frame Tooltips
The description of the category
The description of the current category value
When a user moves into the heading for a frame, the UI will display the description of that frame as a tooltip.
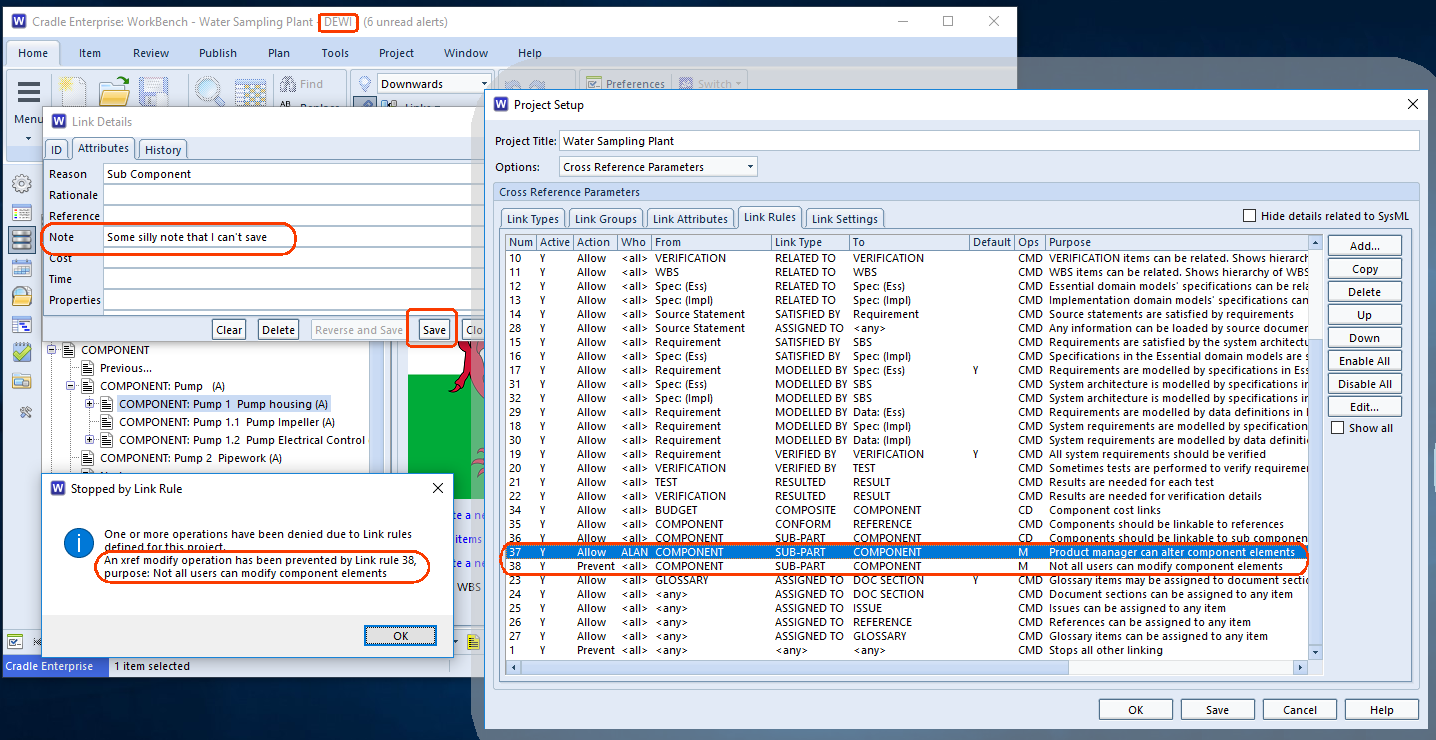
Link Rules
A comment as to the purpose of the link rule can be added to the schema. This is a useful aide-mémoire to those editing the rules. However, if a certain action is prohibited by the rules, then the user is shown why.
In this example two rules have been set up, one to allow user Alan to modify sub-part to component links and another to prevent all users modifying the same link. Because of the top-down sequence of rule matching this has the effect of allowing only Alan to modify cross references of this type. The example shows Dewi trying to modify the link attributes between the Pump parent component and the Pump housing linked as a sub-component. The warning shows why this alteration was prevented. The text from the schema is shown in the dialog.
Link Rule Documentation
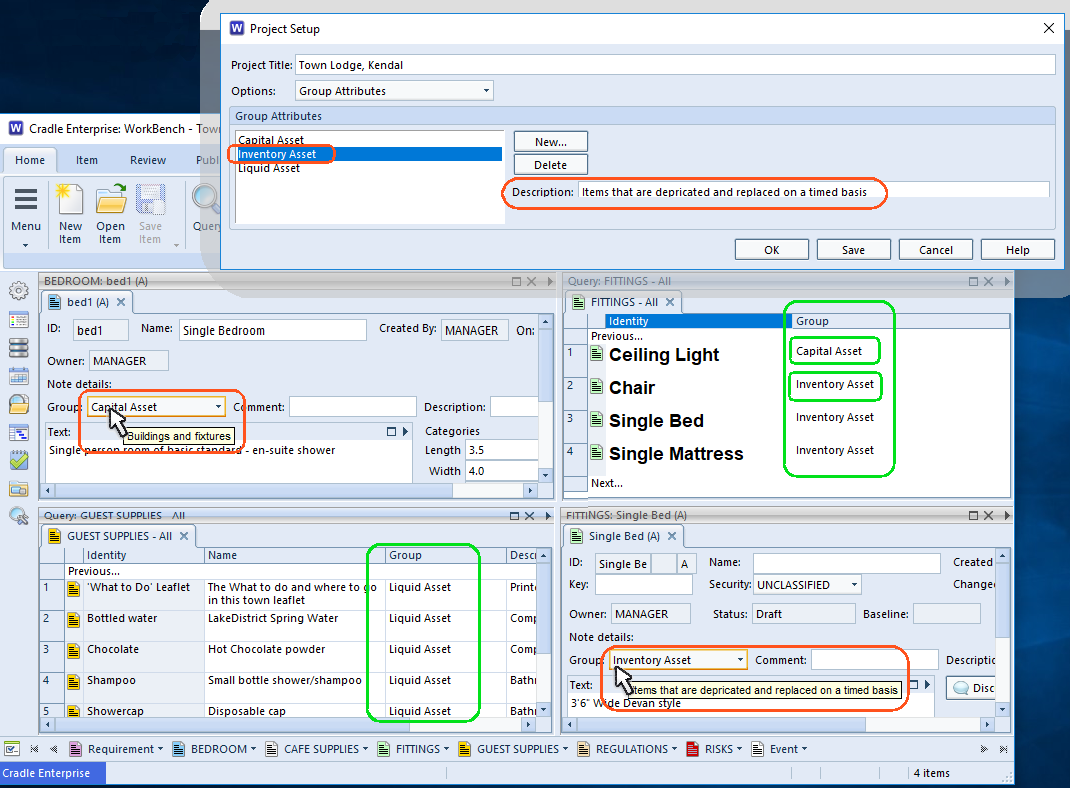
Groups
Within Cradle item types can have a number of different categories. Some item types may share the same categories, others may use unique values.
The Group field is available across the whole project. When the schema contains a number of entries for the Group field, these can be applied to any item type. If the project defines values for the Group, selection is only from the defined list. If no pick-list is defined, it is simply a free-form text field, to use as the user wishes.
Group Descriptions
This example shows three types of assets, Capital, Inventory and Liquid. Some item types may only fall into one group, in this example a physical bedroom is going to be a capital asset, the guest supplies are liquid assets. However, when it comes to fittings, the light is being grouped with the Capital assets and the bed and so on in the Inventory group.
However you choose to use this cross item categorisation, the descriptions given to the group show as tooltips when hovering over the group field in a form.